Pages

Sunday, December 22, 2013

Splitcoast Stampers' Creative Crew Design Team

For this challenge were were to use Candy Dots or Brads. Can you believe I don't have any Candy Dots? I love Antique Brads and just replenished my stash of them.

Project Details
Stamps
Petal Parade
Card Stock & Papers
Sweet Sorbet dsp, Pistachio Pudding, Whisper White, Crisp Cantaloupe
Ink
Pistachio Pudding, Crisp Cantaloupe
Accessories
Sweet Sorbet Accessory Pack, Antique Brads
Tools
Scalloped Tag Topper, 1 ¾ Circle, 1 3/8 Circle Punches

Scrapbook and More Focus: For this challenge, we were to make a calendar, to do list, booklet or journal for a friend to use in 2014. I make this 5 x7 calendar for my BFF every year. I put the pages in a pretty handmade box, and each month she slides the calendar page into a lucite desk frame and she uses it on her desk at work. I make another one for myself that I slide into a magnetic picture frame and keep it on the fridge.
Project Details
Stamps
Happy Watercolor
Card Stock & Papers
Whisper White, Pistachio Pudding
Ink
Garden Green, Strawberry Slush, Early Espresso
Accessories

Tools
Banners Framelits, Blender Pen

Thursday, December 5, 2013

Last Craft Show Items

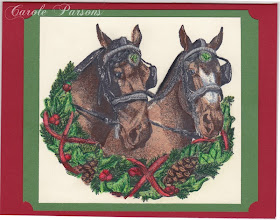
I saw these stamps and couldn't stand not having them. Oh how I've missed my Prisma colored pencils! I don't make all the same card for Christmas, at most I may make 4 or 5 of something. I'm making some of these for my own Christmas Cards and made a set to sell at the craft show.
Cherry Cobbler, Garden Green and Very Vanilla cardstock, More Merry Messages stamp set and Impression Obsession stamps

Wednesday, December 4, 2013

Gift Boxes All Dolled Up

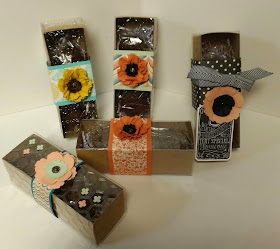
These Tag a Bag Gift Boxes are food safe so I used my Great Grandma's Date Nut Loaf recipe and pored the batter into mini muffin pans. I just couldn't sell them empty:-) I'll be ready to go set up at the craft show bright and early tomorrow morning. My friend Rachael volunteered to help me. Isn't that the sweetest thing?

Gift bags made with Stampin' Up! Paper


Sunday, December 1, 2013

More Craft Show Creations

I'm so happy with the whole printing and binding that Stampin' Up! offers with the My Digital Studio program. I made a cookbook for my son. I wanted to keep illustrations and embellishmets to a minimum cause he is a man! Below are some pictures of it and some more thing I made for the craft show next weekend.


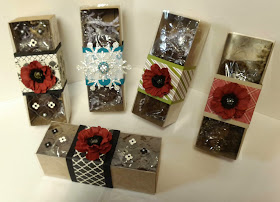
Origami gift boxes,with chocolate inside


Lip balm holders

Notepad cases


Tealight birthday in a box.


Craft Show Creations

I'm ready for the craft show! I have just about everything packed and ready to go. I need to figure out some way to display the wreaths I made. There are only 8 of them, but I need to hang them somewhere.  That moss is so messy when you are working with it, I did all the decorating out in the shop. I took a few pictures while I was working on them, not the best background but you can get an idea of what they look like.
 I sure hope they sell. It took a long time to cut the grapevine and form them into wreaths, then gathering pinecones, but I enjoyed being outside and the dogs were thrilled to have me with them. They laid right by me most of the time, nudging me forto pet them. The wreaths are not real elaborate...natural, just using things that I found. I know the wreaths with that shiny metallic ribbon are very popular right now. People might not like this homespun version. Oh well we'll see.


Wednesday, November 27, 2013

Ornament Swap

My Bible study at St. John's is having an ornamet swap. We'll exchange them at a Christmas luncheon. I choose this ornament with a lovely carved nativity after looking at dozens of ornaments. I decided it deserved a special box... but not just any box, an explosion box. Have you seen them? When you lift the top off, the sides of the box fall open (explode) to reveal the contents! I used the envelope die, Seasons of Style dsp and cherry cobbler 12 x 12 cardstoock. Oh and those pretty little sparkley things? They are called Frosted Finishes embellishments. On the inside of the box I used more of the same package of dsp and the Christmas Collectibles stamp set and coordinating punch. I layered the ornaments on old olive and cherry cobbler and the decorative label punch. To hold the ornament I cut a half inch strip of cardstock and glued it into a circle and glued that to the bottom of the box. I really had fun making it:-D


Tuesday, November 26, 2013

Clean and Simple for Card Ministry

I went with some simpler designs for Card Ministry this time and they turned out lovely! On Dec. 9th, when we meet again we'll be making sympathy cards. I always have such a great time with this wonderful group of ladies!!! I'm so blessed to have made these new friends:) The staff at St. John's United Methodist all sign the cards sent out at weekly staff meetings. They always tell me how much fun they have seeing our creations, which is so very nice to hear. On Sunday, before church, I spoke with a lady who recently received one of our cards from the Ministers and staff. She was so delighted that a group of the congregation made that card for her. This ministry has delighted so many people and given those of us who create for others such a wonderful opportunity for fellowship with each other as well.


Project Details
Stamps
Lovely As A Tree, any birthday greeting
Card Stock & Papers
Midnight Muse 5 ½ x 8 ½  you will get two from one sheet of card stock
                          2 ¾ x 4 ¾ to layer behind trees
Whisper White 4 x 5 ¼ you will get four from one sheet of card stock (emboss w/ dots)
                          2 ½ x 4 ½ to stamp trees on
Ink
Midnight Muse
Accessories
Midnight Muse ribbon
Tools
Perfect Polka Dots embossing folder, Modern Label and Word Window punches


Project Details
Stamps
Any birthday greeting
Card Stock & Papers
Crumb Cake 5 ½ x 8 ½  you will get two from one sheet of card stock
                      3 ¼ x 3 ¼ emboss
Very Vanilla 4 x 5 ¼ you will get four from one sheet of card stock
Real Red 3 ½ x 3 ½
Ink
Real Red
Accessories
Real Red ribbon
Tools
Elegant Lines embossing folder


Project Details
Stamps
Any birthday greeting
Card Stock & Papers
Rose Red 5 ½ x 8 ½  you will get two from one sheet of card stock
Very Vanilla 4 x 5 ¼ you will get four from one sheet of card stock
Ink
Rose Red
Accessories
Elegant Lines embossing folder, Rose Red ribbon
Tools

Saturday, November 16, 2013

Stamp Your Art Out!

My local stamp group met today and we had such fun! Two new people came, Peg and Sandra. We're so glad to meet you!! The cards we made are found below.

Stampin up has a huge Holiday SALE coming up November 20 - December 2. We'll be starting it off with a 24 hour doorbuster sale on the 20.

I have been uber busy with church and getting ready for the big Christmas Craft Show Dec. 6-7. Oh and I'm also making a cookbook for my son on Stampin' Up!'s My Digital Studio. I am want to get it to him for Christmas, but would like to finish it by Nov. 30 because there is a 30% off sale on printing. Stampin' Up will also bind it into a hardback book for me ;-)


Project Details
Stamps
Keepsake Ornaments, En Francais, Gorgeous Grunge, More Merry Messages
Card Stock & Papers
Brushed Gold 2 ½ x 4 ¼
Very Vanilla 4 x 5 ¼
                      2 ¼ x 4
                      4 x 4 for inside
Soft Suede 4 ¼ x 5 ½ card base
Ink
Soft Suede, Crumb Cake
Accessories
Soft Suede ribbon, Basic Jewels Pearls, glue dots, glue, Snail adhesive
Tools
Ornament Framelits, Pretty Print embossing folder, Bow-maker,  Chalk Talk Framelits


Project Details
Stamps
Lovely As A Tree, More Merry Messages
Card Stock & Papers
Night of Navy 4 ¼ x 5 ½ card base
Whisper White 2 ¼ x 4
                         4 x 4 for inside
Brushed Silver 2 x 4
Ink
Night of Navy
Accessories
Whisper White ribbon
Tools
Bow-maker, glue dots, Snail adhesive

Project Details
Stamps
Chalk Talk
Card Stock & Papers
Very Vanilla 2 ½ x 4
                      4 x 4 for inside
Raspberry Ripple 5 ½ x 4 ¼ card base
Print Poetry dsp (rasp. ripple) 1 7/8 x 4 ½
Modern Medley dsp 3 ¼ x 5 ¼
                                 2 ¾ x 4 ¾
Ink
Stazon Black
Accessories
Black chevron ribbon, Linen Thread, Raspberry Clay Ripple flower or Raspberry Ripple Dahlias
Tools
Chalk Talk Framelits

Wednesday, November 6, 2013

There is a reason why my husband calls me Blondie or Lucy.

I had another Lucy episode this morning. I was wiping off the lid of the washer and noticed the inside rim of the basin needed to be wiped off too... Well, you know how the basin part tilts cause that's how the agitation functions? I dropped my clorox wipe down inbetween the basin part and the outside shell. There is no way I can get down in there, I tried. Not too hard because while standing on one leg kinda upside down, I had a vision of me with my arm stuck in the washer. It was a lot like the time I stuck my foot through the bedroom ceiling from the attic. So I'm just going to be quiet and pretend nothing ever happened. If the washer quits working, Patrick will fix it like he always does,he can fix anything.  And if he just happens to find a clorox wipe inside. I'll say, "well I'll be darn, I wonder how that got in there!" Then I will quickly exit stage left!!

Oh and the critter count in the house so far this month is two lizards and three tree frogs. Plus a tree frog in my car yesterday.  Don't even ask.

Sunday, November 3, 2013

Creative Crew Design Team - November

I'm on the design team of Stampin' Up! demonstrators on Splitcoast Stampers. I wanted to share my entries for this month. Oh November, the time of sweaters & blue jeans, cocoa & fires, and just about every kind of yummy food you could ever be thankful for! This month the design team was asked to take a trip down memory lane and remember what we have to be thankful for. The DSP/Color Focus was to use Sweater Weather with the colors Chocolate chip, Crushed Curry, Sahara Sand, Soft Sky, Tangerine Tango. I was so excited to use this paper because I just love it. I couldn't stop at just one card, I made a whole boxed set!


The Creative Focus Was to use KITS. We were to use something with the Pretty Packages line on pages158 & 159 of the main catty or any of the kits or packages in the mini catty. I chose the tag a bag gift boxes because while decorating for our church festival, I loved how they turned out.
For the Holiday focus, we were asked to celebrate national cake day on Nov. 26. I Knew just what I wanted to do! In the tutorial section of Splitcoast, is a cake in a box using a tealight. This one is for my BFF!!

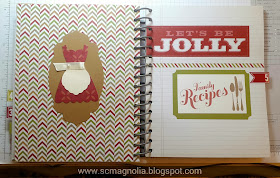
For the Scrapbook focus: The last leg of our journey, we were asked to take that walk down memory lane and share a favorite childhood memory, event, toy, or treat on scrapbook page, mixed media project or with This & That. I just finished my journal. The Seasons of Style This and That is meant to be a type of Christmas planner/organizer. I chose to use a bit of it for that, the calendar and the card list. I titled it Our Christmas Traditions. Instead of using the decor section to plan how to decorate this year, I used it to record how we decked the halls in Christmases through the years. I did the same thing for the section designated for planning the gift wrapping. In the entertainment section, I put all of our favorite holiday recipes. Here are just a few pages to show how I altered the planner organizer.


Thursday, October 31, 2013

Stamping Group Projects

My stamping paper arts group is called "Aiken to Stamp Your Art Out." We met last week and had the MOST FUN! We had three new ladies who were such delights:)
Project Details
Stamps
Teeny Tiny Wishes, Modern Mosaic, Very Merry Tags
Card Stock & Papers
Whisper White 3 ¾” x 3 ½” and 4 ¾” x 6 ¼”
Cherry Cobbler 3” x 4 ½”
Old Olive 4” x 3 ¾” and 4 ¾” x 9 ¼”  
Ink
Cherry Cobbler, Old Olive
Accessories
Linen Thread, Cherry Cobbler Chevron Ribbon, Stampin’ Dimensionals, Rhinestones basic jewels
Tools
Modern Mosaic embossing folder, Mosaic punch, Modern Label punch, Word Window punch, Sticky Strip, hole punch, Glimmer brads, clear medium envelopes (p. 162), Paper-Piercing Tool, Stampin’ Pierce Mat, Paper-Piercing Pack


1.       Cut a 4 3/4"  x 9 ¼"  piece of cardstock and score at 1" and 2" on the 9 ¼" side. This will be the for back and spine of book.
2.       Fold cardstock over at the 2" score mark. This will form the spine of the book.
3.       Apply Sticky Strip to the end of the front panel.
4.       Adhere the 6 ¼" x 4 ¾" piece of cardstock (the front cover) to the exposed Sticky Strip
5.       Peel the plastic lining of the clear envelope seal, line the envelope up with the back of the book and tape down. Layer all envelopes on top of each other.
6.       Use a hole punch to make holes for the brads then attach two brads.
7.       Decorate brag book as desired.


Project Details
Stamps
Christmas Collectibles, More Merry Messages
Card Stock & Papers
Bermuda Bay, Whisper White and Winter Frost DSP
Ink
Bermuda Bay, Pool Party
Accessories
1/8” Silver Ribbon, Basic Jewel Rhinestones, Stampin’ Dimensionals
Tools
Ornament Punch, Perfect Polka Dots embossing folder
Bermuda Bay 5 ¼ x 4, 4 x 2 ¾, and 3 ¾ x 2
Whisper White 5 ½ x 8 ¼ , 5 x 3 ¾ and 1 ¾ x 3 ½  
Winter Frost DSP 2 ½ x 3 ¾
Project Details
Stamps
More Merry Messages, Lovely As A Tree
Card Stock & Papers
Basic Black, Cherry Cobbler, Very Vanilla, Modern Medley DSP
Ink
Garden Green, Cherry Cobbler, Soft Suede
Accessories
Frosted Finishes Embellishments, 1” Stitched Grosgrain  Cherry Cobbler Ribbon , Bakers Twine
Tools
Window Frames Framelits, Dazzling Details, sponge, Window Frames Framelits, Glue Dots
Basic Black base 4 ¼ x 5 ½
Cherry Cobbler 4 x 5 ¼
DSP 3 ¾ x 5
Very Vanilla 4 ¼ x 4 ¼ and 3 ¼ x 1 ½