background

Tuesday, October 28, 2014

Christmas Is Coming

Ornamental Pine is such a classic stamp set. That must be why I like it so much. I'm a classic kinda girl ya know? I love putting different effects to simulate snow on the pinecones and branches. I've used the splotches on the Gorgeous Grunge stamp set with white embossing powder, and Dazzling Details. I've even used puffy paint stuff with my heat tool. It is a pen called 'Snow Marker' from Marvy Uchida. I got it at a scrapbook store while traveling. To make these pinecones snowy, I prefer white embossing powder. How to apply that to the negative spaces on the stamped pinecone was a challenge. I tried various markers, but they all dried before I could get the embossing powder on. I could not find the embossing pen I used to have, but I looked on another shelf and spotted a bottle of embossing ink. Aha! I grabbed a tiny paint brush, applied ink to the negative spaces, grabbed my tweezers, dipped it in my box of white embossing powder and fired up the heat tool. SUCESS!

Project Details
Stamps
Ornamental Pine, Gorgeous Grunge
Card Stock & Papers
Very Vanilla: card base 5 ½ x 8½ score at 4 ¼
                           2 ¾  x 4 ¼  
Soft Suede:    3 x 4 ½  
Ink
Soft Suede, Mossy Meadow, Chocolate Chip, Silver Encore Metallic
Accessories
Gold, Dazzling Details
Tools
Stampin’ Dimensionals
design by Julie Gearinger

Project Details
Stamps
Ornamental Pine, That’s The Ticket
Card Stock & Papers
Early Espresso:  5 ½ x 8½ score at 4 ¼
                                 2 ½ x 3 ¾
Cherry Cobbler: 4 x 5 ¼
                                 2 3/8 x 3 5/8
Whisper White:  3 ¾ x 5  Woodgrain embossed
                                 2 ¼ x 3 ½
Trim the Tree DSP: 2 x 3 ¾
Ink
Mossy Meadow, Early Espresso
Accessories
Pearls Basic Jewels, Antique Brad, White Organza ribbon dyed with Always Artichoke ink pad
Tools
Woodgrain embossing folder, Ticket Duo Punch


Ornamental Pine

Did I mention that this was my favorite stamp set? I really like Brian King's idea of layering the white organza ribbon over a strip of DSP. I intend to use that idea again:)

Project Details
Stamps
Ornamental Pine
Card Stock & Papers
Cherry Cobbler: card base 5 ½ x 8½ score at 4 ¼
                                3 ¼ x 4 ½
Trim the Tree DSP Stack: 4 x 5 ¼ (green), 5/8 x 4 ¾ red
Whisper White: 3 x 4 ¼   
Ink
Garden Green, White Craft Ink Pad
Accessories
Whisper White Organza Ribbon, Stampin’ Dimensionals
Tools
Ticket corner punch (retired)


Saturday, October 25, 2014

My Favorite Christmas Card

I think... lol  This design is floating all over the internet. I saw Billie Moan's version and that's what made me think I just HAD to buy this stamp set. Using the Blendabilities on top of white embossing is genius. I have now finished making enough Christmas cards to send out to friends and family. I may make some more to donate for sale at our Church Apple Festival, but it feels good to be ahead of the game in one area of my Christmas preparations;)


I’ve been using this great sparkly pen on several cards lately.  It’s Sakura brand Gelly Roll ‘clear star.’  I got a couple of them at a Stamping/Scrapbooking Convention a couple years ago. Stampin’ Up! sells a white one and a chalk marker that I like as well.

I’ve also gotta tell you about using alcohol ink markers over white embossing. After making a few of these cards, I really got the hang of it. The alcohol in the markers really reacts with the embossing powder even though it’s been heated/hardened and cooled. It’s cool because it allows you to blend a lot more. It feels like I’m painting! I saw some white rub off on the light green marker. Just to be careful, when I was finished, I scribbled on a plain sheet of white paper to get any excess off the marker. Look at the difference between the two below. I made the first one before I realized how easily they blended on top of embossed areas. The second one has more colors and they are blended better.


Project Details
Stamps
Oranmental Pine, Gorgeous Grunge, More Merry Messages
Card Stock & Papers
Basic Black, Cherry  Cobbler, Brushed Silver,
Ink
VersaMark and Blendability Pens Old Olive, Crumb Cake and Smoky Slate - all markers in a package.
Accessories
Sheer Cherry Cobbler Ribbon, All Is Calm Snowflake Embellishments, White Embossing Powder, Linen Thread
Tools
 Stampin’ Dimensionals, Heat Tool

Friday, October 24, 2014

Festival of Trees

I've been making Christmas cards and some thing to donate to the craft booth at our church Apple Festival. I didn't take pictures of the wreaths yet, but I will before they sell!  http://scmagnolia.blogspot.com/2013/09/gift-bag.html
Tutorial on how to make the gift bag: http://scmagnolia.blogspot.com/2013/06/card-set-box-tutorial.html
Tutorial on how to make the card set boxhttp://scmagnolia.blogspot.com/2013/06/card-set-box-tutorial.html
Design by Fiona Whitten
Project Details
Stamps
Festival of Trees
Card Stock & Papers
Lost Lagoon: card base 5 ½ x 8½ score at 4 ¼
Pool Party: 4 x 5 ¼
Whisper White: circle Framelit 5th from outside
Brushed Silver: circle Framelit 4th from outside
Glimmer Paper: star punch
Ink
Lost Lagoon
Accessories
1/8” Silver Ribbon
Tools
Circles Framelits, Star punch, Tree punch, Decorative Dots embossing folder

Design by Debra Currier
Project Details
Stamps
Festival of Trees
Card Stock & Papers
Whisper White: card base 5 ½ x 8½ score at 4 ¼
                                circle Framelit 6th from outside
Glimmer Paper: star punch
All is Calm DSP: circle Framelit 7th from outside
Ink
Early Espresso, Garden Green Cherry Cobbler Blendabilities marker
Accessories
Cherry Cobbler Bakers’ Twine, Basic Metal Button
Tools
Circles Framelits, Star from Itty Bitty Accents punch, Tree punch, En Pointe embossing folder

Project Details
Stamps
Festival of Trees
Card Stock & Papers
Crumb Cake, Lost Lagoon, Typeset Designer Series Paper, Pool Party, Very Vanilla
Ink
Lost Lagoon, Pool Party, Crumb Cake
Accessories
Rhinestone Basic Jewels, All Is Calm Snowflake Embellishment, Linen Thread, Stampin’ Dimensionals
Tools
Tree punch, Deco Framelits, Banners Framelits, Northern Flurry embossing folder


Christmas Cards and Rock n' Roll

You'd think I would listen to Christmas music while making Christmas cards wouldn't you? Nah, I've been rockin' out to Queen, Maroon Five, Andy Grammer, Beyonce, Pharrell Williams, Katy Perry, and then there's Taylor Swift, Luke Bryan, Carrie Underwood and Miranda Lampert. That's today, yesterday it was Enya and Nora Jones. I'd like to say I simply have eclectic taste, but then my brother says, "nah, you're just weird!"  Don't you just love big brothers? I love mine, he is a great guy. Who LOVES to tease his little sister!!
Below is a picture of some of  the ladies at my Stamp Your Art Out class that meets once a month. Thanks for the picture Peg!


Project Details
Stamps
Festival of Trees, More Merry Messages
Card Stock & Papers
Real Red, Whisper White, Trim The Tree Designer Series Paper Stack
Ink
Real Red, Garden Green
Accessories
Linen Thread, Real Red ribbon
Tools
Scallop Tag Topper Punch, Tree punch, On Point Textured Impressions folder

Monday, October 20, 2014

Wonderful Watercolor With Ornamental Pine

This afternoon I had the stereo turned up while I played with watercolor effects. First I stamped on the watercolor paper, then sprayed the paper with the mister of water. That was too misty, so I applied ink to the stamp, then misted once lightly with water, after I wiped my face off, as I had the spray nozzle faced the wrong way! The first few times I inked the stamp with sponge daubers, then I got smart and inked the entire thing with Wild Wasabi, and only used the daubers for the Mossy Meadow and Soft Suede. I'm not going to toss the splotchy one, I kinda like it. I'll look at it for a while then figure out how to use it.


Project Details
Stamps
 Ornamental Pine, More Merry Messages
Card Stock & Papers
 Watercolor paper, Cherry Cobbler, Wild Wasabi
Ink
 Cherry Cobbler, Wild Wasabi, Soft Suede, Gold Metallic
Accessories

Tools
 Spray Mister

Ornamental Pine and a Weekly Special

 I'm having a weird day. I sat down to make one card with these colors... then I had to make another one and change something... and then another to change something else. Before I knew it, I had made 5 cards. I haven't bought any embossing powder for years. I have lots of it, mostly from a company that is now out of business, called The Powder Keg. They had what we used to cal 'designer powders.' They mixed lots of custom combinations to get some really great effects.
  • On my first card, I used Basic Gray for the top pine branch and Silver Pearl embossing powder, on a Soft Sky cardstock. 
  • Next, I used Lost Lagoon for the top pine and omitted the Soft Sky layer.
  • Then I switched to Ivory embossing powder.
  • I returned to the Soft Sky cardstock layer, and used Gorgeous Grunge for some snow.
After all that, I wish I had white embossing powder! lol

Project Details
Stamps
Ornamental Pine
Card Stock & Papers
Lost Lagoon, Whisper White, Soft Sky
Ink
Lost Lagoon, Craft White, Soft Suede, VersaMark
Accessories
Silver Ribbon, Venetian Crochet Trim, Stampin’ Dimensionals, White Embossing Powder
Tools
Heat Tool


I've also got to tell  you about this week's specials, because there are a couple of my favorites on there. Click Here to see all of this week's specials.  I've had my eye on this Doily die for a while now, as I love the lacy look and can think of plenty of uses for it. The Decorative Window Gift Boxes can be dolled up so cute for Christmas. With this sale, 6 boxes for 3.71.. that's 62 cents each. You just can't beat that!!


Friday, October 17, 2014

Christmas and Halloween

The more I use this stamp set, the more I like it! This is a simple card using the Festival of Trees stamp set and the Hearts & Stars Decorative Masks. I simply adore these things! The two masks are only $2.95 and so easy to use. Place the mask where you want it, and sponge your choice of ink over top. Voila! Instant awesomeness!! I originally planned to use them for mixed media on a 12 x 12 sheet of watercolor paper, but have found many more uses for them!

Project Details
Stamps
 Festival of Trees, More Merry Messages
Card Stock & Papers
 Crumb Cake, Whisper White, Glimmer Paper
Ink
 Garden Green, Cherry Cobbler, Craft White
Accessories
 Linen Thread, Cherry Cobbler Ribbon (retired), Cherry Cobbler Blendabilities marker
Tools
 Tree punch, Star punch, Hearts & Stars Decorative Masks, Sponge Dauber

Hearts & Stars Decorative Masks. Order Here
 Tree Punch $16.95. Order Here.
Festival of Trees Stamp Set $15.95. Order Here.
OR Save by ordering the bundle!
Festival of Trees Bundle $27.95. Order Here.

Projects from Stamp Your Art Out Class

Project Details
Stamps
Festival of Trees
Card Stock & Papers
Garden Green Cherry Cobbler, Whisper White, Under the Tree DSP, Silver Glimmer paper
Ink
Garden Green,  Cherry Cobbler
Accessories

Tools
Tree Punch, Heart from Owl punch, Small Tree punch (ornament, star, tree pack)
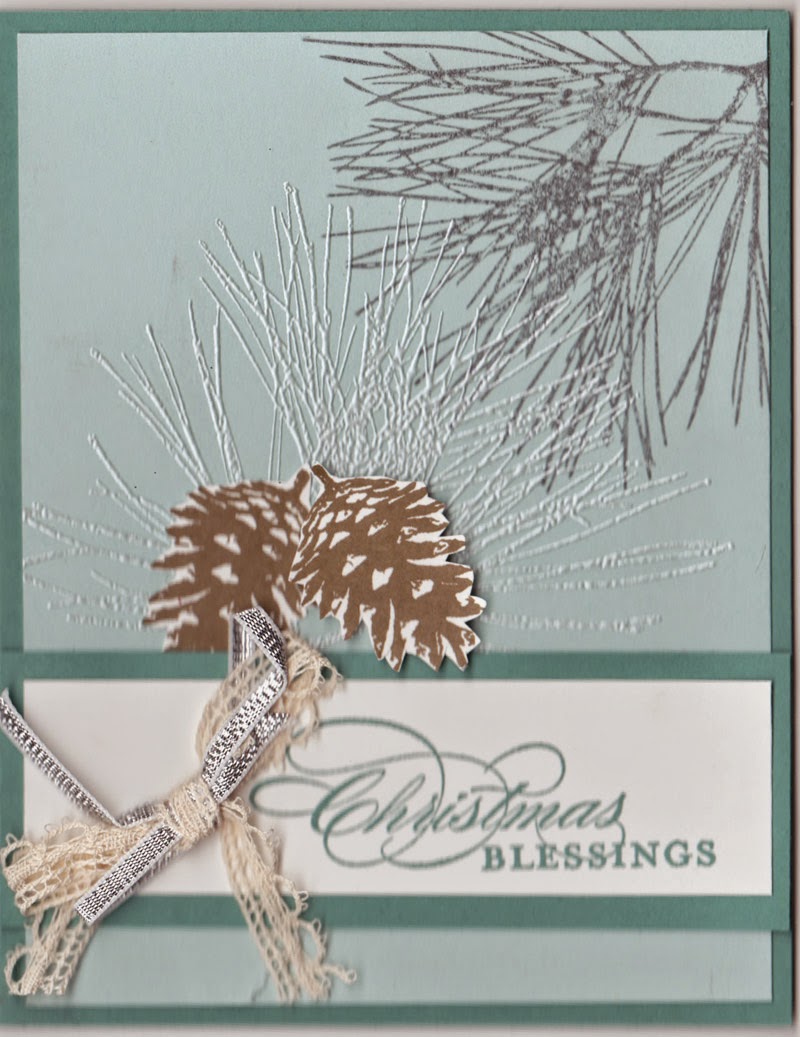


Project Details
Stamps
Holiday Home
Card Stock & Papers
Whisper White, Soft Sky, Pear Pizzazz, Lost Lagoon, Smoky Slate, All Is Clear Designer Series Paper
Ink
White Craft, Basic Gray, Pear Pizzazz, Lost Lagoon
Accessories
Stampin’ Dimensionals, Cherry Cobbler Blendabilities marker, Dazzling Details
Tools
Homemade Holiday Framelits, Modern Label  punch, Decorative Dots embossing folder
Matchbox Treat Holders
Using the Envelope Punch Board

  1. Cut a piece of paper 6 x 6 then punch and score at 2 inches
  2. Turn paper, then punch and score at 3 inches
  3. Turn, then punch and score at 2 inches
  4. Turn, then punch and score at 3 inches
  5. Line up score lines and score and punch all the way around the paper
  6. Fold over one of the smaller flaps and line up the score line at 1 1/8 inches                                                                                          
  7. Using the paper snips cut the tabs on the bigger flaps
  8. Fold your score lines and then fold the first score line and then again at the second score line~ do this all the way around
  9. Fold in your flaps and add adhesive
  10. Adhere your flaps to make the sides of the boxes do the smaller flaps first
  11. attach tabs to longer flaps and then adhere the flaps to make the sides of the box
  12. Cut 3 ¾ x 6 ¾ and score at 1 ¼,  2, 4 3/8, 5 1/8
  13. use Sticky strip on the longer of the flaps
  14. place tray inside and then bring the cardstock around and adhere

Jack O’Lantern
eyes: 1” circle punch- 2 white, two black (trimmed), 1 orange cut in half
 nose: ¾” circle punch- 1 orange with a smidge trimmed off

Frankenstein
eyes: ¾” circle punch- 2 white, 1 green cut in half  and ½” black for pupil
nose: ¾” circle punch 1 green