It's that time again! Are you ready to get your sleuth on? Grab your stamping supplies and let's make something!
Remember, don't stress, there is no worrying allowed lol! Just have fun and roll with it. You will come up with something pretty! It doesn't matter if it looks like mine, because I'm going to show you how to make it when we 'solve' the mystery. So if you card is different than mine, you will have two new card designs, how cool is that?
Don't forget to come back to my blog or YouTube channel on Monday to 'solve the mystery.'
Printable Clues
Clue #1 Locate
the following:
- Trimmer w/scoring blade
- Bone Folder
- Paper Snips
- Stamp set/s with coordinating dies if
you like
- 2 patterns Designer Series Paper (DSP)
- Ink pads that coordinate with the DSP
- Cardstock colors that coordinate with
the DSP as well as Basic White or Beige
- Stylish Shapes Dies or any
other shapes that are approximately 2-1/4" wide
- Adhesives
- Embellishments
of your choice
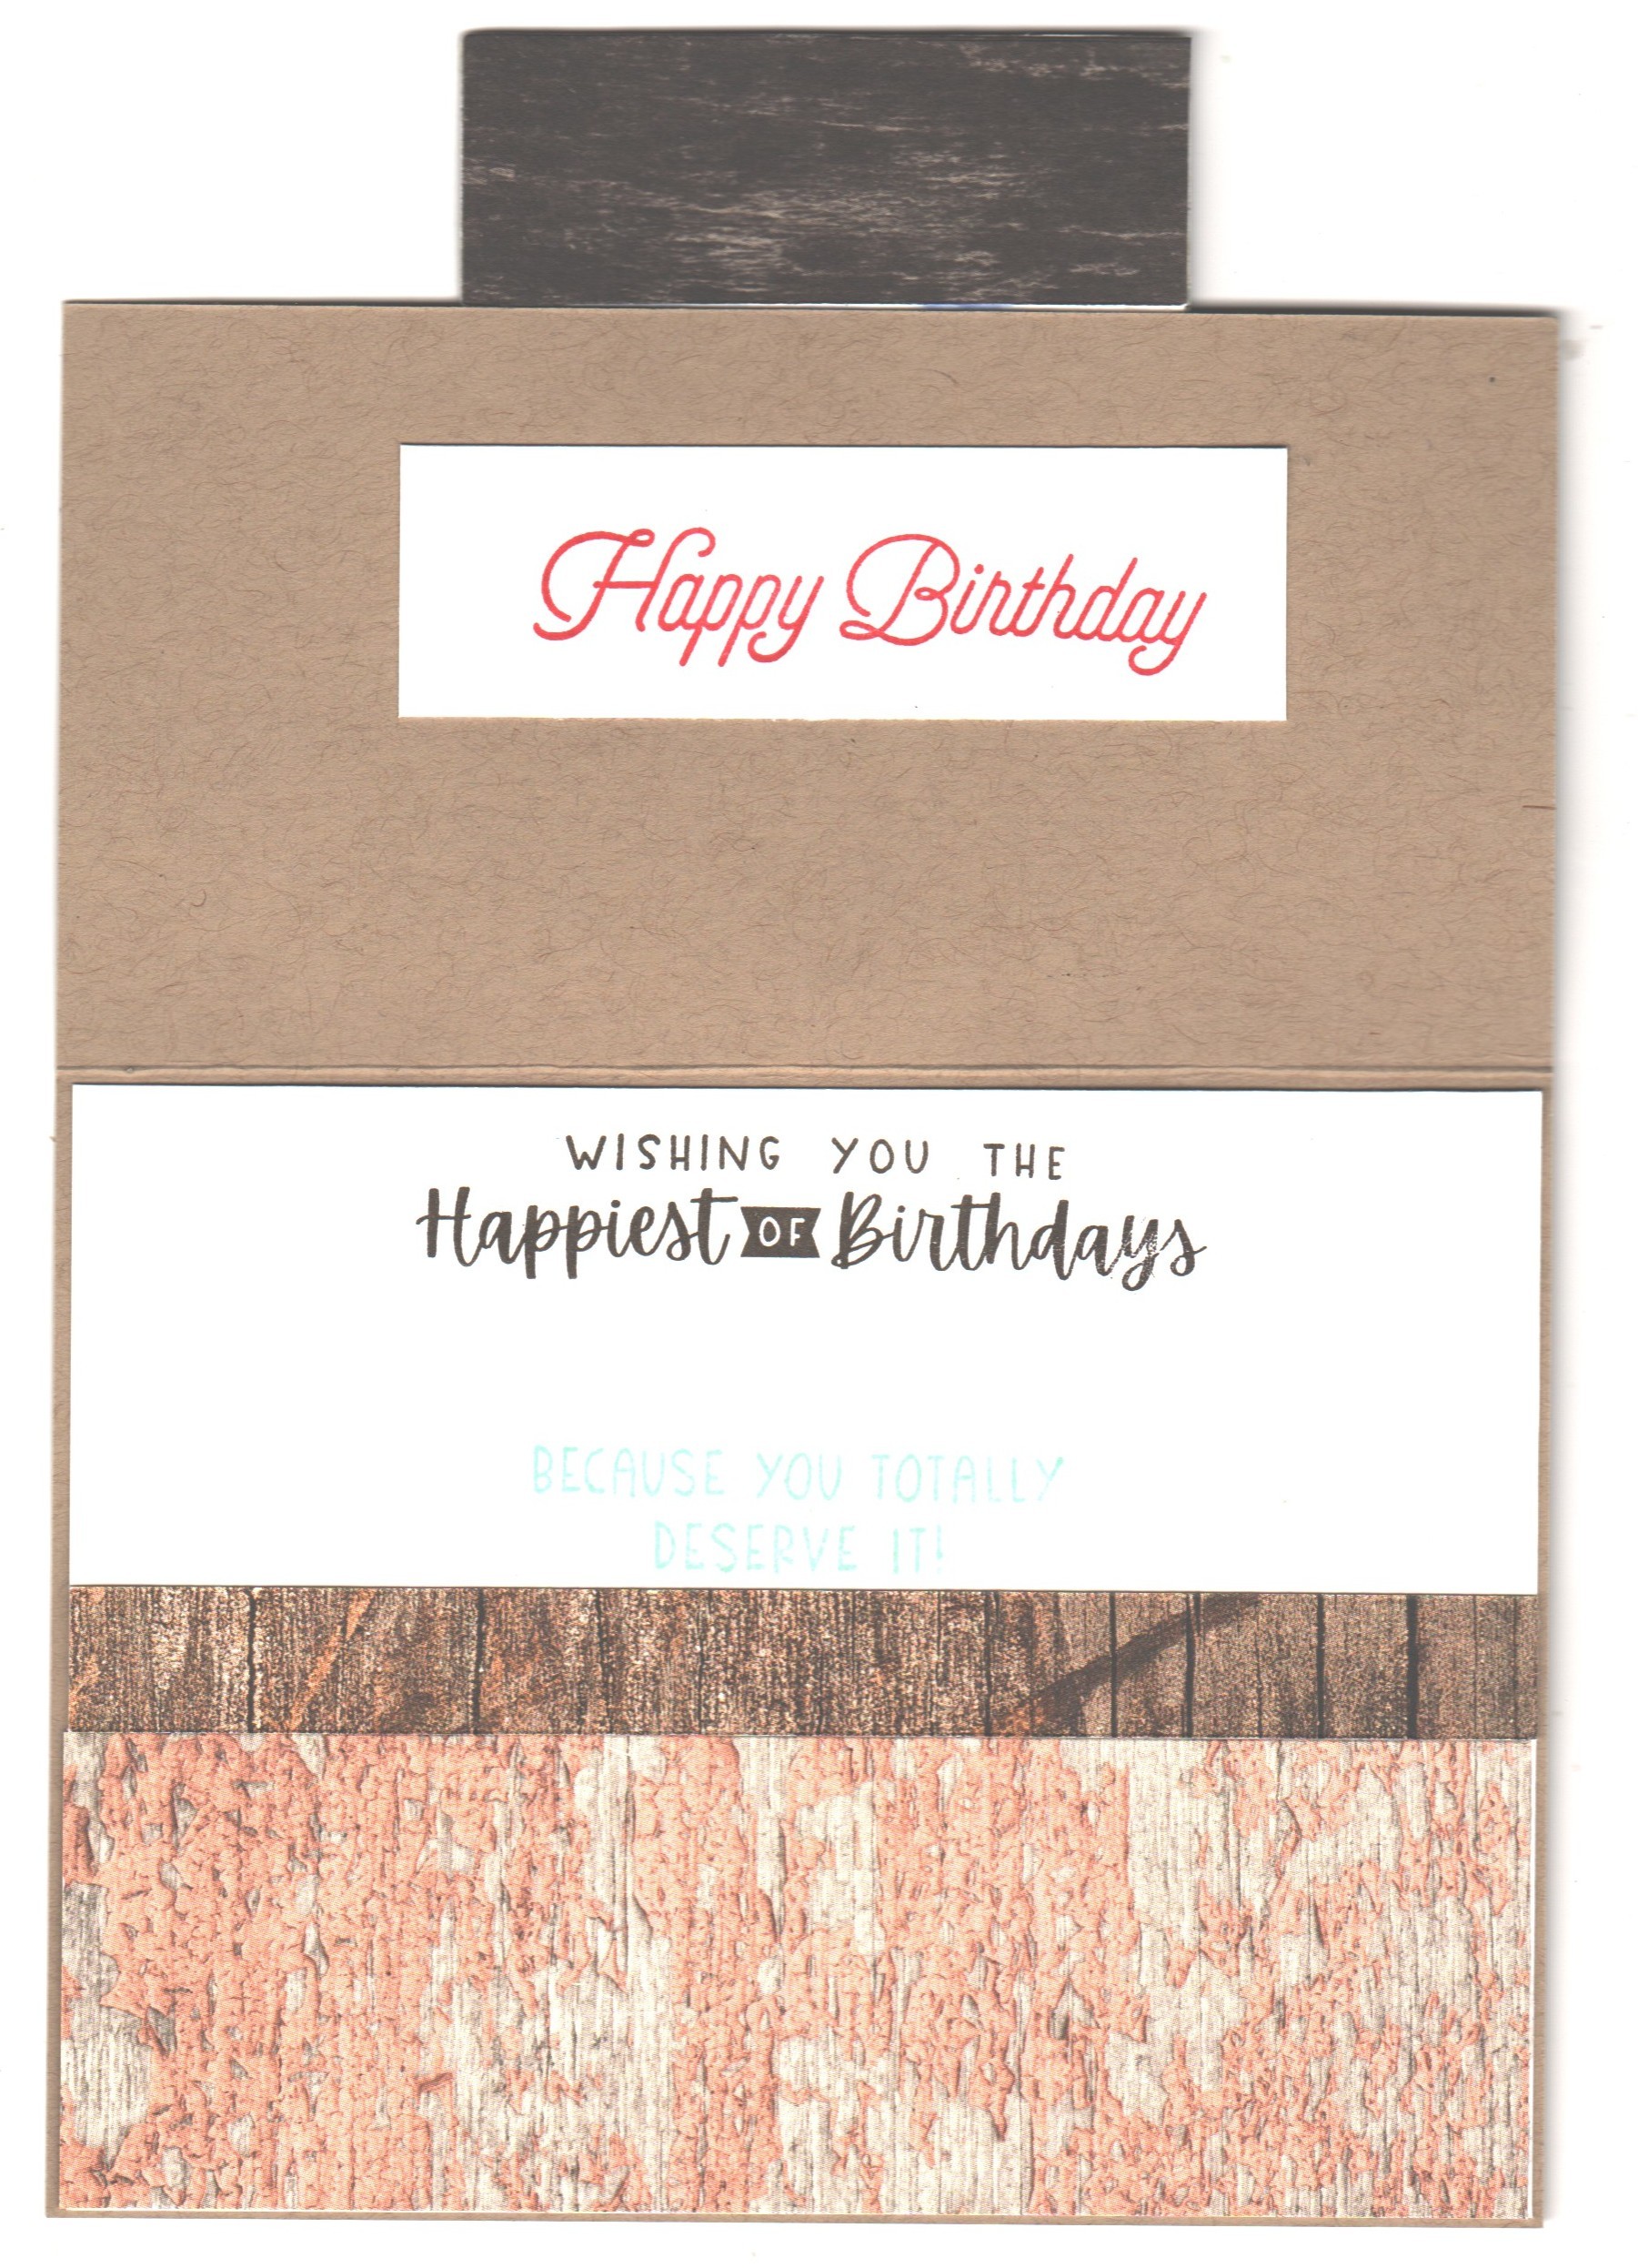
Clue #2 Cut
card base 5-1/2″ x 4-1/4″ from cardstock that coordinates with
DSP
Clue #3 Adhere
4″ x 5-1/4″ DSP pattern
A to front of card base.
Clue
#4 Cut 4-1/4″ x 5-1/2″ cs score @ 3-1/4″ on long side. Fold
on score line; burnish well with bone folder to make a small card
Clue
#5 Cut DSP pattern B 2″ x 4″ adhere to left front of
small card
Clue
#6 Cut DSP pattern B 3″ x 4″ adhere to inside
small card
Clue
#7 Adhere the small card to the center of the card base
Clue
#8 Diecut two 2nd largest squares from Stylish Shapes Dies on
6″ x 3″ cardstock. You can use any other shape in
place of dies, if desired
Clue
#9 Stamp greeting on one of the square diecuts and sentiment for
inside on the other square.
Clue
#10 Adhere one square diecut to center of small card front (right
side will hang off edge).
Clue #11 Adhere
other square diecut inside of small card so that both squares align
with each another.
Clue #12 Embellish
with coordinating diecuts, stamped images, gems etc.


.jpg)