1. One sheet of 12x12 designer series paper.
|
|
2. Score at 1 ½ , 3, 3 ¾, 8 ¼, 9 and 10 ½
|
|
3. Rotate your paper and score at 3, 4 ½, 7 ½,
and 9
|
|
4. Use a bone
folder to reinforce all the folds, folding in toward the pattern you want on
the inside of the completed box.
|
|
5. Place the side
of the paper that has five spaces (3, 4 ½, 7 ½, and 9 inch score marks)
across top in front of you. Locate the score mark that is 4 ½ inch from the
edge. Make a diagonal fold from the corners to that 4 ½ inch score line. Do
this on all four sides.
|
6. Locate the score
line that is 1 ½ inch from the edge of the paper and fold that in toward the
center. You can see it done on the right and left sides of the photo to the
right.

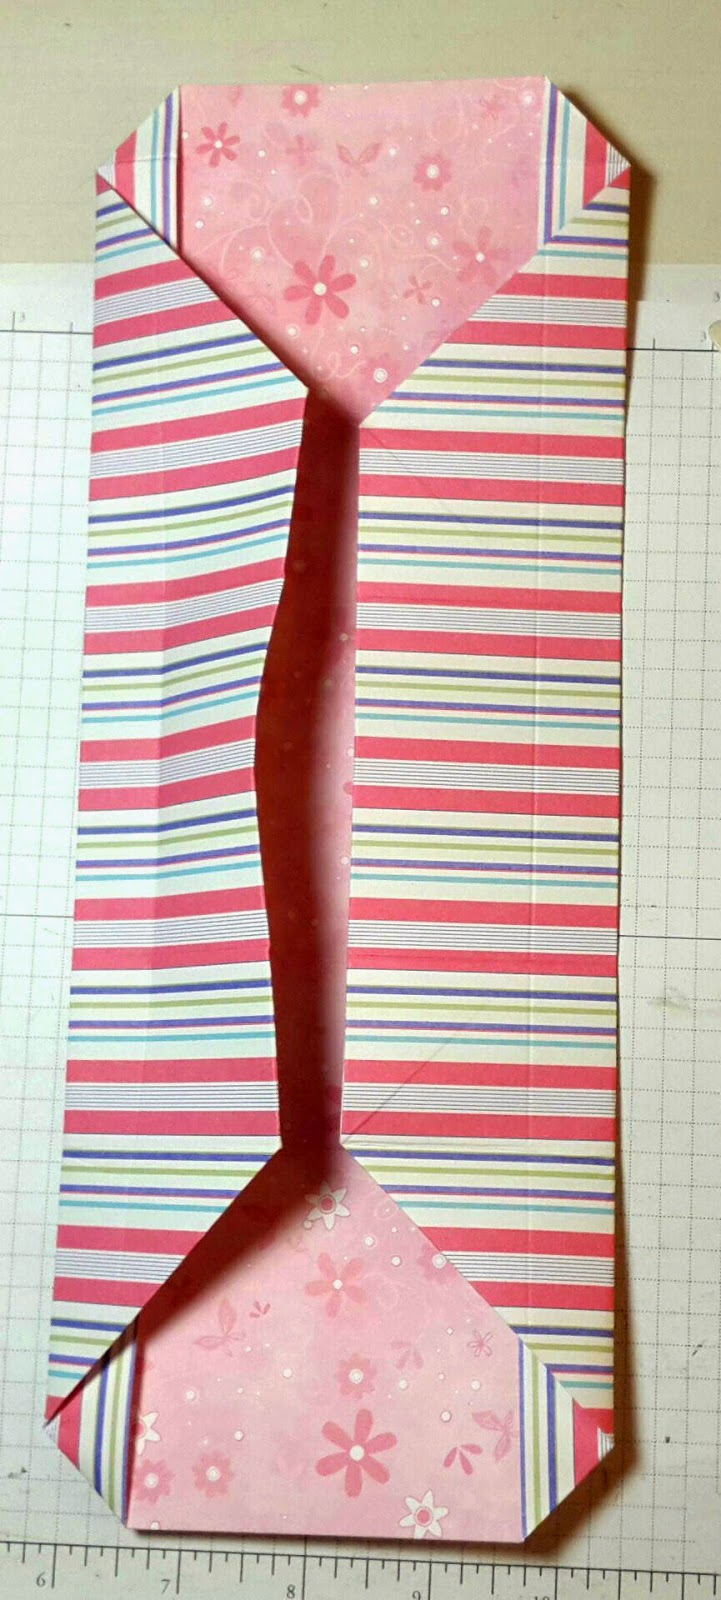
7. Rotate the paper
one quarter turn to the rights. Now you want to reverse the 4 folds shown in
the previous photo. Place your finger in the triangle on your left and you
will see a flap pop up. Fold the flap you just opened to your left. The photo
to the right shows the end results after you do this to all four corners.
8. Rotate the paper
one quarter turn to the right. Fold the left and right sides to the center.
At this point reinforce all the score lines with your bone folder.

9. Reinforce the
score marks that are 3 and 4 ½ inches from the ends (short sides). This will
make a big difference on how sharp and crisp your finished box looks.
10. Here comes the
fun, magical part! See the score line that is ¾ of an inch for the edge of
each long side? This will become a lip beside the box. Begin with the one on
the left side. Put your left index finger just outside the edge of the score
line. Bend it up and to the left.