My Stampin' Up order came in this week and I've made my first card with the truck. I've been looking for an old pickup for quite a while. I didn't want whimsical, and it had to be from the 50's. I found it in the Stampin' Up catalog and drove it home.
 |
| Updated: I just got home and looked at the truck below and thought YUCK that ribbon does not go. So I disassembled it and put burlap behind it instead. I'm much happier with it now. |
 |
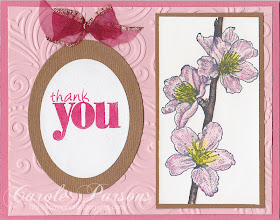
| Still playing with that peach blossom:) |
After Jamie suggested 'see through' yesterday that made me think of tackle boxes. So, while in Walmart buying printer ink, this cute little box just cried out, "take me home, I'm only four dollars and I don't want to be in some old fishy smelly boat." So what could I do?
Do you collect directions and tutorials? I do and I print them out. I also have written many of my own for classes that I've taught or for my blog. Naturally I save them (some are way over ten years old) in binders.
 |
| Inside the covers are pages from an old calendar I made. I hated to throw them out ya know? |
 |
| Magazine articles, directions I wrote for classes and tutorials I found on line are arranged alphabetically in these binders. |
 |
| I couldn't bare to part with this piano hinge book after I made it, so I keep notes about various stamps and ideas inside. |
 |
| I made this flower press a long long time ago. I stained some old plywood scraps, drilled holes in the corners and put in some screw thingys. I think they are called wing nuts? You can tighten or loosen them as needed when pressing flowers and leaves. The decoration on the outside is nothing I did, it's just a card that has great sentimental value to me. |
 |
| I cut up old corrugated cardboard for the inside layers. |
 |
| I use sheets of white paper so any moisture and/or colors will be absorbed by it. When they get icky, I toss them and add more. |
 |
| Remember that Spellbinders inventory I posted last week? I bound the pages so it could live on my shelf and not a mess of papers. |


