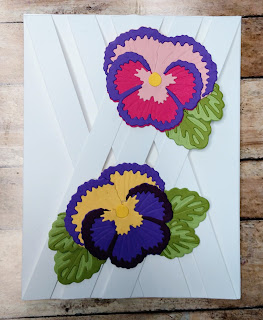
Here is the tutorial for the Lattice Technique. I love this technique! Thanks to BiBi Cameron who developed this technique. There are written directions below and a video tutorial as well.
Materials:
Stamps: Pansy Patch stamp set
Paper: Basic White, Thick Basic White
Ink: Melon Mambo
Tools: Pansy Dies, Washi Tape or other low tack tape
Preparation:
Thick Basic White 4-1/4 x 5-1/2 card base
Basic White 4-1/4 x 5-1/2
Basic White 8-1/2 x 1/2 six strips
Assemble Card:
Dry fit first before gluing. Place one strip with the edge on the corner of the upper right of the 4-1/4 x 5-1/2 Basic White piece in a diagonal direction. Place the next strip with a gap in between the strips approximatly 1/2 inch-ish. The last strip should touch the bottom right corner. Adjust strips as needed, leaving ends out beyond the top and bottom of the 4-1/4 x 5-1/2 cs.
Hold the strips in place with a clear block, then use washi tape or low tack tape to hold the strips in place. Then run adhesive across the back of the 4-1/4 x 5-1/2 cs. Fold the top strips back behind the large piece of cs and secure in place. Trim of any excess.
Repeat step three using the remaining strips on the right hand side.
Once all six strips are secured in place, trim the bottom pieces so they are flush with the bottom the larger cs.
Adhere the 4-1/4 x 5-1/2 with the strips to a 4-1/4 x 5-1/2 THICK Basic White cs.
Stamp and diecut for embellishment as desired.

