


Tuesday, March 29, 2016
Tuesday, March 22, 2016
Botanicals Gift Set
I have been working on this for a few days and just finished. I know I've said this before, but I LOVE LOVE LOVE these Botanical Builder Thinlits and coordinating stamps!! I made this set of cards for one of my nieces.
Would you like to make this style of card set holder? Here is a FREE Tutorial. Please see me for ordering your stamping needs:) I'd appreciate your business.


Would you like to make this style of card set holder? Here is a FREE Tutorial. Please see me for ordering your stamping needs:) I'd appreciate your business.


Saturday, March 19, 2016
The Coolest Accident Technique!
These are the cards we made in class today. For the first card I wanted to use the Rose Garden die cut and color it with sponge daubers. I got out my daubers, sponged away... and wow! When I lifted the pretty colored die cut to put on my card, I was delighted at what I saw on my scratch paper! It worked like a stencil, leaving a beautiful negative image. Naturally, I grabbed some Whisper White to put under another die cut to do it on purpose!! Wow, so pretty:)
The last one is an origami folded card for the men in our lives.


The last one is an origami folded card for the men in our lives.


|
Project Details
|
|
|
Stamps
|
Rose Wonder
|
|
Card Stock & Papers
|
Whisper White: Card base – 8 ½ x 5 ½, score at 4 ¼
5 ½ x 3 ¾ die cut rose
Dazzling Diamonds Glimmer Paper – punched shaper
|
|
Ink
|
Pool Party, Bermuda
Bay, Pear Pizzazz, Island
Indigo
|
|
Accessories
|
Pool Party Glitter Ribbon, Stampin’ Dimensionals
|
|
Tools
|
Sponge Daubers, Rose Garden Thinlits, Large Oval Punch,
Decorative Label Punch
|

|
Project Details
|
|
|
Stamps
|
Indescribable Gift
|
|
Card Stock & Papers
|
Blushing Bride: Card base – 8 ½ x 5 ½, score at 4 ¼
Whisper White: 4 ¼ x 2 ¼ and 4 x 5 ¼
Early Espresso: ¾ x 4 ¼
|
|
Ink
|
Blushing Bride, Early Espresso, Pear Pizzazz
|
|
Accessories
|
|
|
Tools
|
Sponge Daubers, Decorative border punch
|

 |
| when open |
|
Project Details
|
|
|
Stamps
|
Perfect Pairings
|
|
Card Stock & Papers
|
Botanical Gardens DSP: 7 ½ x 10
Whisper White: 3 ½ x 3 ½ (inside greeting)
|
|
Ink
|
Memento Tuxedo Black
|
|
Accessories
|
Perfect Accent Dots, Sharpie Markers
|
|
Tools
|
Bone Folder, Corner Rounder Punch
|
- 7 ½ x 10 desired pattern face down (Botanical Gardens DSP)
- fold in half length-wise
- open back up and fold both sides to meet in the center (notice pattern)
- fold collar piece back about ¾ inch
- bring the left top corner point to the center about ¾” down from the top, repeat with left side
- bring the bottom up to the top underneath the collar, then crease bottom section
- to make sleeves, open back up about ½” down from fold line, fold the bottom section out to form a triangle
- round shoulder corners then refold under the collar
Saturday, March 12, 2016
Georgeous Paper!
Spring is here is the deep south! It's in the 80's today, dogwoods and azaleas are blooming and lookin' good:) As I've mentioned before, I'm slightly addicted to the Botanical Builder Thinlits, well, now We can add this beautiful designer paper to the list, because I am seriously in love with it. I already have a second package on my next order lol! The first two cards were done with the drapery fold, explained in a previous post. The last one is the Joy Fold. I really like it a lot because it's so different and not hard to make.


 |
| FREE PDF Tutorial HERE |
Tuesday, March 8, 2016
Card Ministry
We made Easter treats for the Ministers and staff today along with some birthday cards for the seniors in our congregation.


Weekly Deals

Click any image below to see this week's amazing discounted products, when you order from my website, http://www.stampinup.net/esuite/home/cparsons/
Special prices until Monday,
March 14th, 2016, at midnight,
or while supplies last.
DON'T FORGET: check out the Clearance
Rack while you're there! Clearance Rack items count towards your $50
total to get a free Sale
A Bration reward choice, too!


Sunday, March 6, 2016
Hoppy Easter
This cute card was done with punches. I just realized that Easter is the end of THIS month! yikes! I've got to get going making my Easter cards! I used the Woodgrain embossing folder, the branches from the bird builder punch, and cut the eggs and grass free-hand. The bunny feet and ears are the large and extra large oval punches. His face is the ornament punch, and small ovals for the cheeks.

 The Cross box that I shared with you in an earlier post, now has candy inside it. I found that Hershey eggs fit perfectly. So tomorrow at Card Ministry, we're making this for our ministers and some treat holders out of fry boxes for the staff. We'll also make some birthday cards for the seniors in our congregation.


Wednesday, March 2, 2016
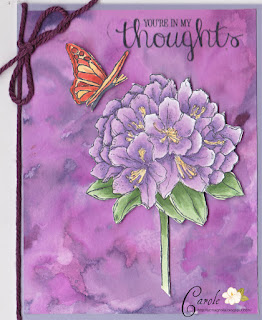
Bequiling Backgrounds
These are fun backgrounds to make. Shimmery White card stock, an Aqua Painter and Reinkers make them foolproof and sooo much fun! The difference between the two backgrounds is less water.
I used X-press It blending card and Copic markers to color the flower. Click here for a FREE TUTORIAL.


Tuesday, March 1, 2016
Peachy Pretty
I love this stamp, it is so much fun to color with Copics. I wanted to match the Watermelon Wonder, so I used, R22, R20, and YR18. I used the retired Darling Doily Thinlits, and cut just a corner of it to put behind the flower.

Product List

Product List


Bikin' It
Emboss resist is such a fun technique, and the Shimmery
White card stock is perfect for watercoloring.
It reacts differently than regular watercolor paper. It’s really smooth, so the stamped images are
very crisp and clean. It also accepts water & reinker well, and doesn't
pill like regular cardstock. The colors stay vibrant, and there's
a delicate shimmer on both sides that just adds such a nice effect. Using Stampin' Up! reinkers with an Aqua Painter is such an easy way to watercolor.
Product List


Subscribe to:
Posts (Atom)