background

Friday, March 23, 2012

War With Mounted Stamps

As God is my witness I will never unmount another Magenta stamp again! The foam on those things is some indestructible stuff!! It's really quite a testament to Canadian craftsmanship. I felt as though it was an all out war... and I was General Patton. 'The enemy was quite the formidable foe. I was outflanked and outmaneuvered. There were many casualties: my hands, my fingernails, my back, my sanity, and the Tack n' Peel on my acrylic block.

How did unmounting stamps mess up my Tack n' Peel you ask? That foam would not come off!! I was desperate. I decided to leave it on, but it was soooooo sticky! So I put baby powder on the foam backing to get rid of the stickiness. I rubbed and rubbed to get all the residue off.

Big mistake, the baby powder caused my Tack n' Peel to lose its stickiness. Even water did not resuscitate my TAP. I played taps, gave it a burial in the trash can. I had lost the war and was exhausted. What was I to do? Well, I'm General Patton so when the going gets tough..... I took a nap!

Note to self... when the label on a chemical (uh that would be Goo Gone) says to observe caution when getting in contact with skin... heed the warning!!!

Pictures from our brave war correspondent:
After using the powerful microwave weapon
Time to bring out the heavy artillery
casualties
under heavy attack, reinforcements called in
The enemy refuses to be subdued, even after heavy sanding
I did not surrender, but I will not go to war against this foe again. The worst casualty, the hands bore witness to photographs that are too graphic to publish.

Wednesday, March 21, 2012

I am Obsessed With Impression Obsession and Northwoods

Love these companies, love these images!! I find coloring so relaxing and it is so much fun! I enjoy sitting at my desk in front of the large window my studio while working away. I listen to music and can see all the flowers that are in bloom this time of year. The first two images I got with a gift certificate from winning an Impression Obsession challenge. You can see all the gorgeous entries from the challenges here. I had the most fun making these and am anxious to make more. I used a Tim Holtz wood grain embossing folder on them then distressed the edges and sanded a bit on the coffee card. A bit of Flower Soft makes the flowers around the bell pop a bit. When I was growing up, we had a bell on our farm and used it to call the guys in from out in one of the pastures or on the track with a horse. My husband and I have one on our place now too.

I was inspired by  Dini Kowal's take on the coffee card. Seeing how she colored it, is what made me want that stamp. I too, wanted to make that blue and white spatter enamelware. Since I was using Prismacolor pencils I decided to try a white-out pen for the spatters. When I finished they looked too bold ... something was just off, so I very faintly colored the palest blue pencil over the top of them. That helped, but I will continue to experiment with other ways to get the spatter on there.

The last image is relatively new as well and comes from Northwoods. I did it a bit differently this time and I thought you might get a giggle out of my attempt to cover a mistake. The little dragonfly charm is covering some oily spot on the cardstock. Lord only knows what I spilled on it! I kinda like the little guy just flitting about the page. I think it's a happy accident. 


Tuesday, March 20, 2012

Easter Egg Template - All Cracked Up!

I woke up yesterday with a cracked egg in my head. No, for Easter silly! I don't know if it just came to me or if I saw a card like this at some point, but it was in my head and I had to make one. I even have a template for you, but don't get too excited, it's not a pretty computer generated template. It's hand-drawn and you may laugh. I couldn't draw it on the computer because when lightening hit the computers last fall, it fried them both. Of course when you replace, you get an updated operating system... and naturally some programs won't run on the newer version of Windows. Why would they? Because then Microsoft wouldn't get as many of our hard-earned dollars buying MORE software!!!  argh!  I decided I would not replace the drawing program I had. It's expensive and I'm retired. Soooo you just have to make due with my hand drawn template. If you are talented, you can improve or revise it. My friend Pam is an engineer and actually has a left-brain (you know, mechanical/analytical). She helped me figure out a better way to construct the opening with the paper fastener. I want you to know I worked on this thing alllll morning yesterday. I bet I made six different templates - seriously. See, I have NO left brain. I'd get to one step and it wouldn't work or looked goofy, so I'd figure out a better way to do it. Then Pam came up with a better closure and I came home and dug through the computer trash can to find a previous template.

This is just a prototype... a model. My next egg will look a bit neater.
The next one I can cut the decorative paper better with the template, and I think the flower or whatever image goes in the middle should be centered better. Image is from Impression Obsession, cardstock is Stampin' Up - Certainly Celery and Bashful Breeze. I have no earthly idea where I got the decorative paper, probably Hobby Lobby.
Opening the card reveals the inside. I used an embossing folder on the inside egg. (Sizzix, Tropical Paisley). I made the inside egg a bit smaller than the outside cracked egg so that it wouldn't show edges behind.
This is the inside egg.
This is the outside cracked egg. I cut this from cardstock.
This pattern is a bit smaller so that when you glue/tape the decorative paper on the cardstock, you have a border.

I scanned the templates into Photoshop. Since I no longer have a compatible draw/paint program, I could only save this as a jpeg so you may have to adjust the size a bit. On my computer it prints out the correct size.... but I print from Photoshop, so I'm not sure how it will work on your computer.

I hope you enjoy this, I thought it was fun. Well, I thought it was fun after I finally figured out how to make it! lol  You may want to have the crack open from the top. Somehow, in my brain it needs to open from the bottom. If you make one please show me I'd love to see what you come up with!!

Update: 3/21/2012
Guess what I just found while looking through my Spellbinders' Inventory list? That's right, nested egg shapes!!! Then we wouldn't even need a template whoo hoo:)

Monday, March 19, 2012

Baby Cards, Templates, and a Doll Lost & Found

Two of my nieces just had babies!! Instead of stamping, I used templates. I really like the unique 3D look they offer when making a card. The template for a little girl's dress is from Stampington: http://www.stampington.com/temptingtemplates/ The template for a little boy is from Deneen on A Path of Paper:  http://apathofpaper.blogspot.com/2008/07/little-boy-overalls.html

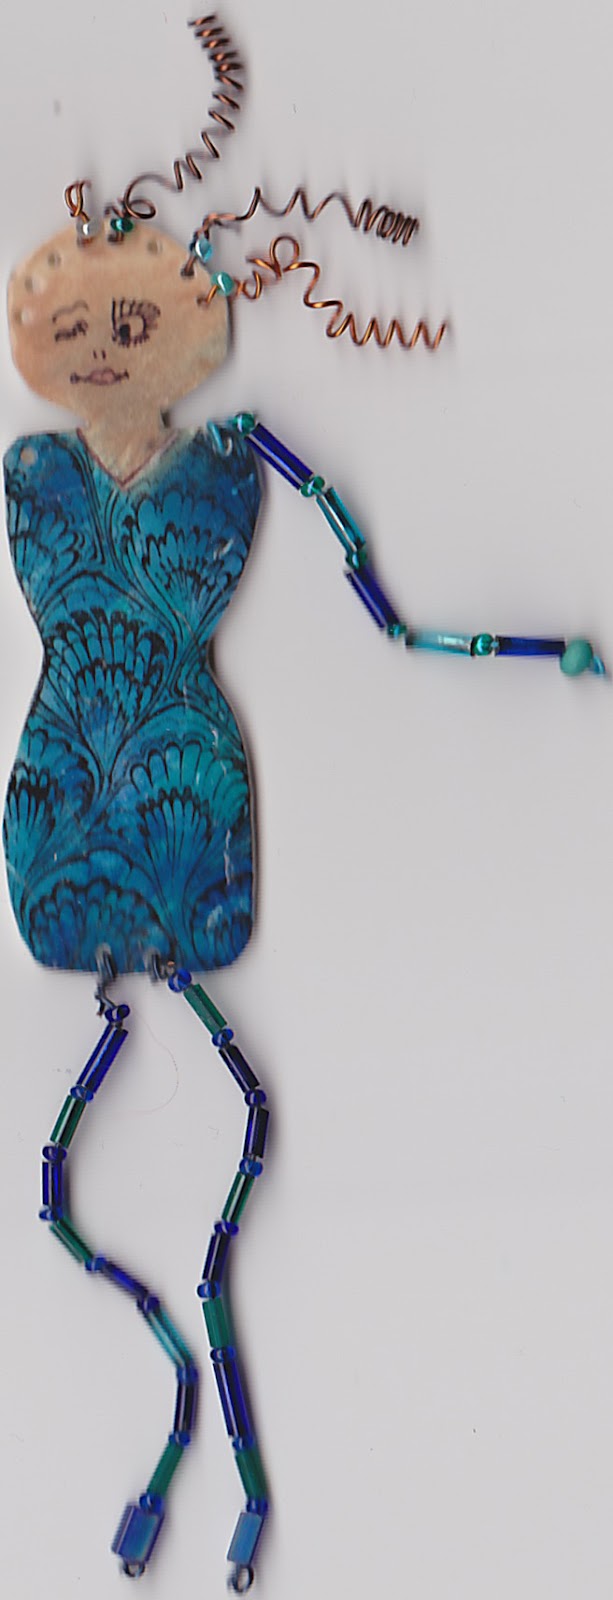
This poor little doll sat in my drawer for ten years without an arm and most of her hair! I think I remember being discouraged because she didn't turn out like she looked in my head. So, I threw her in the drawer, she got shoved to the bottom and I forgot about her. I found her this week and decided nothing is perfect, and I'd finish her.
Two arms and all of her hair... such as it is. I saw shrink plastic dolls like this at the Atlanta Stamp show in 2001 or 2002. This company was selling kits to make them. I'd spent all my money.... and I kind of have an aversion to kits... I'd rather make my own. So when I got home I did my version of one.... mostly. I can not remember the name of the company. It seems like it began with a Z. Zum Goli or something like that. I've searched Gingerwood's list of companies, found a couple that began with Z and looked at their websites. Nothing with shrink plastic or dolls, just stamps.

Sunday, March 18, 2012

Weddings

My friend's daughter is getting married in May, so I need a wedding card and a shower card. Another friend has a wedding to go that month as well. I'm making cards for both of us, and it's such fun. The first card was done with the Manhattan Flower embossing folder. The flower is turned upside down and a portion cut away to reveal a wedding dress. Isn't it the most lovely idea? Nooo I didn't think of it. I got the idea from Amy Celona. I just changed it a bit to reflect the colors this bride is using in her wedding. The greeting is from Stampin' Up's Love & Laughter. I just cut rectangles and used a corner punch to make it look... well... better.


Nope, didn't come up with this one either!! The template for this card is from Lynn Pratt and you can get it here: http://stampndesigntemplates.blogspot.com/2010/08/does-it-work.html   I found this pretty puffy paper in Hobby Lobby along with the pearls. Don't you just love 40% coupons and half off sales?
The stamps on the cards below are from Stampin' Up's Love & Laughter. I used cardstock from Hobby Lobby -open stock, and a Martha Stewart punch gave me the lacy look. I also used some corner punches in the last two. The punch that makes the notches, is from Marvy Uchida and the other one doesn't have a company name on it - it's very old. The inks were Cat's Eyes, Encore Metallics and Distress. I just chose pretty purples, I don't worry about them being the same color to match. I know Stampin' Up people all over the world are probably gasping! No offense, but it just doesn't matter to me. I kinda like the fact that the colors blend rather than match. I guess I'm quirky like that! lol

This is my least favorite..the die from Cheery Lynn was supposed to look like a cake stand.... but hmmm not so much. I think I'll take it off and put something else there.


Friday, March 16, 2012

New Art Stamp and Organized Ideas

My Stampin' Up order came in this week and I've made my first card with the truck. I've been looking for an old pickup for quite a while. I didn't want whimsical, and it had to be from the 50's. I found it in the Stampin' Up catalog and drove it home.
Updated: I just got home and looked at the truck below and thought YUCK that ribbon does not go. So I disassembled it and put burlap behind it instead. I'm much happier with it now.
Still playing with that peach blossom:)

After Jamie suggested 'see through' yesterday that made me think of tackle boxes. So, while in Walmart buying printer ink, this cute little box just cried out, "take me home, I'm only four dollars and I don't want to be in some old  fishy smelly boat." So what could I do?
 Do you collect directions and tutorials?  I do and I print them out. I also have written many of my own for classes that I've taught or for my blog. Naturally I save them (some are way over ten years old) in binders.
Inside the covers are pages from an old calendar I made. I hated to throw them out ya know?
Magazine articles, directions I wrote for classes and tutorials I found on line are arranged alphabetically in these binders.
I couldn't bare to part with this piano hinge book after I made it, so I keep notes about various stamps and ideas inside.
I made this flower press a long long time ago. I stained some old plywood scraps, drilled holes in the corners and put in some screw thingys. I think they are called wing nuts?  You can tighten or loosen them as needed when pressing flowers and leaves. The decoration on the outside is nothing I did, it's just a card that has great sentimental value to me.
I cut up old corrugated cardboard for the inside layers.
I use sheets of white paper so any moisture and/or colors will be absorbed by it. When they get icky, I toss them and add more.
Remember that Spellbinders inventory I posted last week? I bound the pages so it could live on my shelf and not a mess of papers.

Thursday, March 15, 2012

Impression Obsession Challenge

This is my card for the "Spring is in the Air" challenge at Impression Obsession. I recently bought this peach blossom stamp (F12006) cause I'm a Carolina Girl and we LOVE peaches! Oh, just for the record, South Carolina produces more peaches than any state in the country except California. Georgia may be the peach state, but WE grow more peaches! yum!!

Oh, have y'all checked out the new online store at Impression Obsession?  They now have samples linked to many stamp images so you can see how they 'stamp up.' It's a beautiful new website, one that I certainly plan on visiting often.
The embossing folder is Paper Studio, the cardstock is from open stock at Hobby Lobby as is the ribbon.