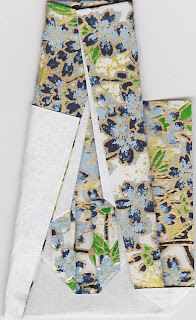
I always have such fun with origami! I know how to make a few different types of kimono folds, but this one is my favorite, so I thought I'd share it with you:) Printable copy
1. Begin with a 2 by 8 inch piece of paper. Fold a small cuff (approx. ¼ inch) at the bottom of the paper and turn over.
2. Fold right corner up to almost center. Do the same on the left. This forms the collar.
3. Fold bottom up 2 inches, then turn over.
4. Fold top down just above the crease.
5. Fold right top corner just past center diagonally. The bottom of this diagonal line fold (near the collar, is more narrow than the other end). Do the same fold on the left side.
6. Fold the top layer of the bottom right, out to lie flat. Press it down with your thumb. It’s kind of squash fold; it forms triangle. Do the same on the other side.


7. Fold the top right corner out diagonally and then repeat on the left side. These two folds make the open fold at the bottom of the finished kimono.


