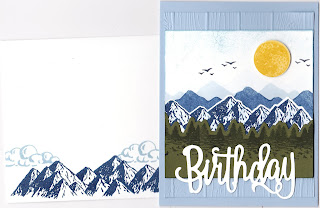
Below are posters showing the elements included in the bundle and how they work together to build scenes.
Most are done left to read as normal when reading, but a couple a backwards due to a morning without coffee.
Most are done left to read as normal when reading, but a couple a backwards due to a morning without coffee.
Watercolor Stamping Technique
- First, cut a layer of watercolor paper and spritz it with water, or use an Aqua Painter to apply water.
- Stamp the solid side of the mountains stamp with Balmy Blue ink (stamp off once 1st), the mountains again with Night of Navy (stamp off once 1st)
- stamp the row of trees twice with Night of Navy ink (full strength.) The ink will bleed, which is the effect you want in watercolor. You may want to have some paper towels nearby to mop up the water and remove too much color.
- While the paper was still damp, hand watercolor the sky using Lovely Lipstick, Terracotta Tile, and Grapefruit Grove ink with an Aqua Painter. Just “stamp” a small clear block in the ink and paint with Aqua Painter from that palette. You can also use an Aqua Painter to add some Balmy Blue ink to the lake portion on the bottom.
- After the paper is fairly dry, stamp the detailed side of the stamps with both Balmy Blue and Night of Navy ink. You can use the Aqua Painter to soften the details and add brush strokes as you like.
- When the paper is thoroughly dry, use an Embossing Buddy to remove the static, stamp over mountains in VersaMark and emboss in white.
- Cut the larger trees out of watercolor paper first, then use an Aqua Painter to watercolor them with Night of Navy ink.
- For the smaller tree and row of trees, spritz the watercolor paper, then stamp with the solid side (stamp off once 1st). When the paper is dry, stamp with the detail side. Then use the coordinating dies to cut them out.
- Heat emboss the sentiment in white on Night of Navy Cardstock, cut out with Classic Label Punch, and finish off with a bit of Braided Linen Trim.


