.png)
Flip Flap Fold
 |
| Four Versions of this one, Beige, Peacock, Olive and Red |
.png)


Say hello to some familiar favorites! Now you and you can enjoy a selection of returning Designer Series Paper favorites in all new colors! Be sure to check out the video below. This paper is available in our Online Exclusive category.

Check out the handy flyer then slip over to the website to order

Sale on retiring items from the Holiday Catalog!
check out all the fun things you missed, now Many are on sale!
There are several new offerings in the Online Exclusives. I've highlighted two below, but be sure to check out the Layered Landscapes. You can create frameable art for just $25.
The new mini catalog will be here soon, but there areValentine's Day products available in the Online Exclusives too! Click Here to see Online Exclusives


From the 2024–2025 Annual Catalog:
Important Information:
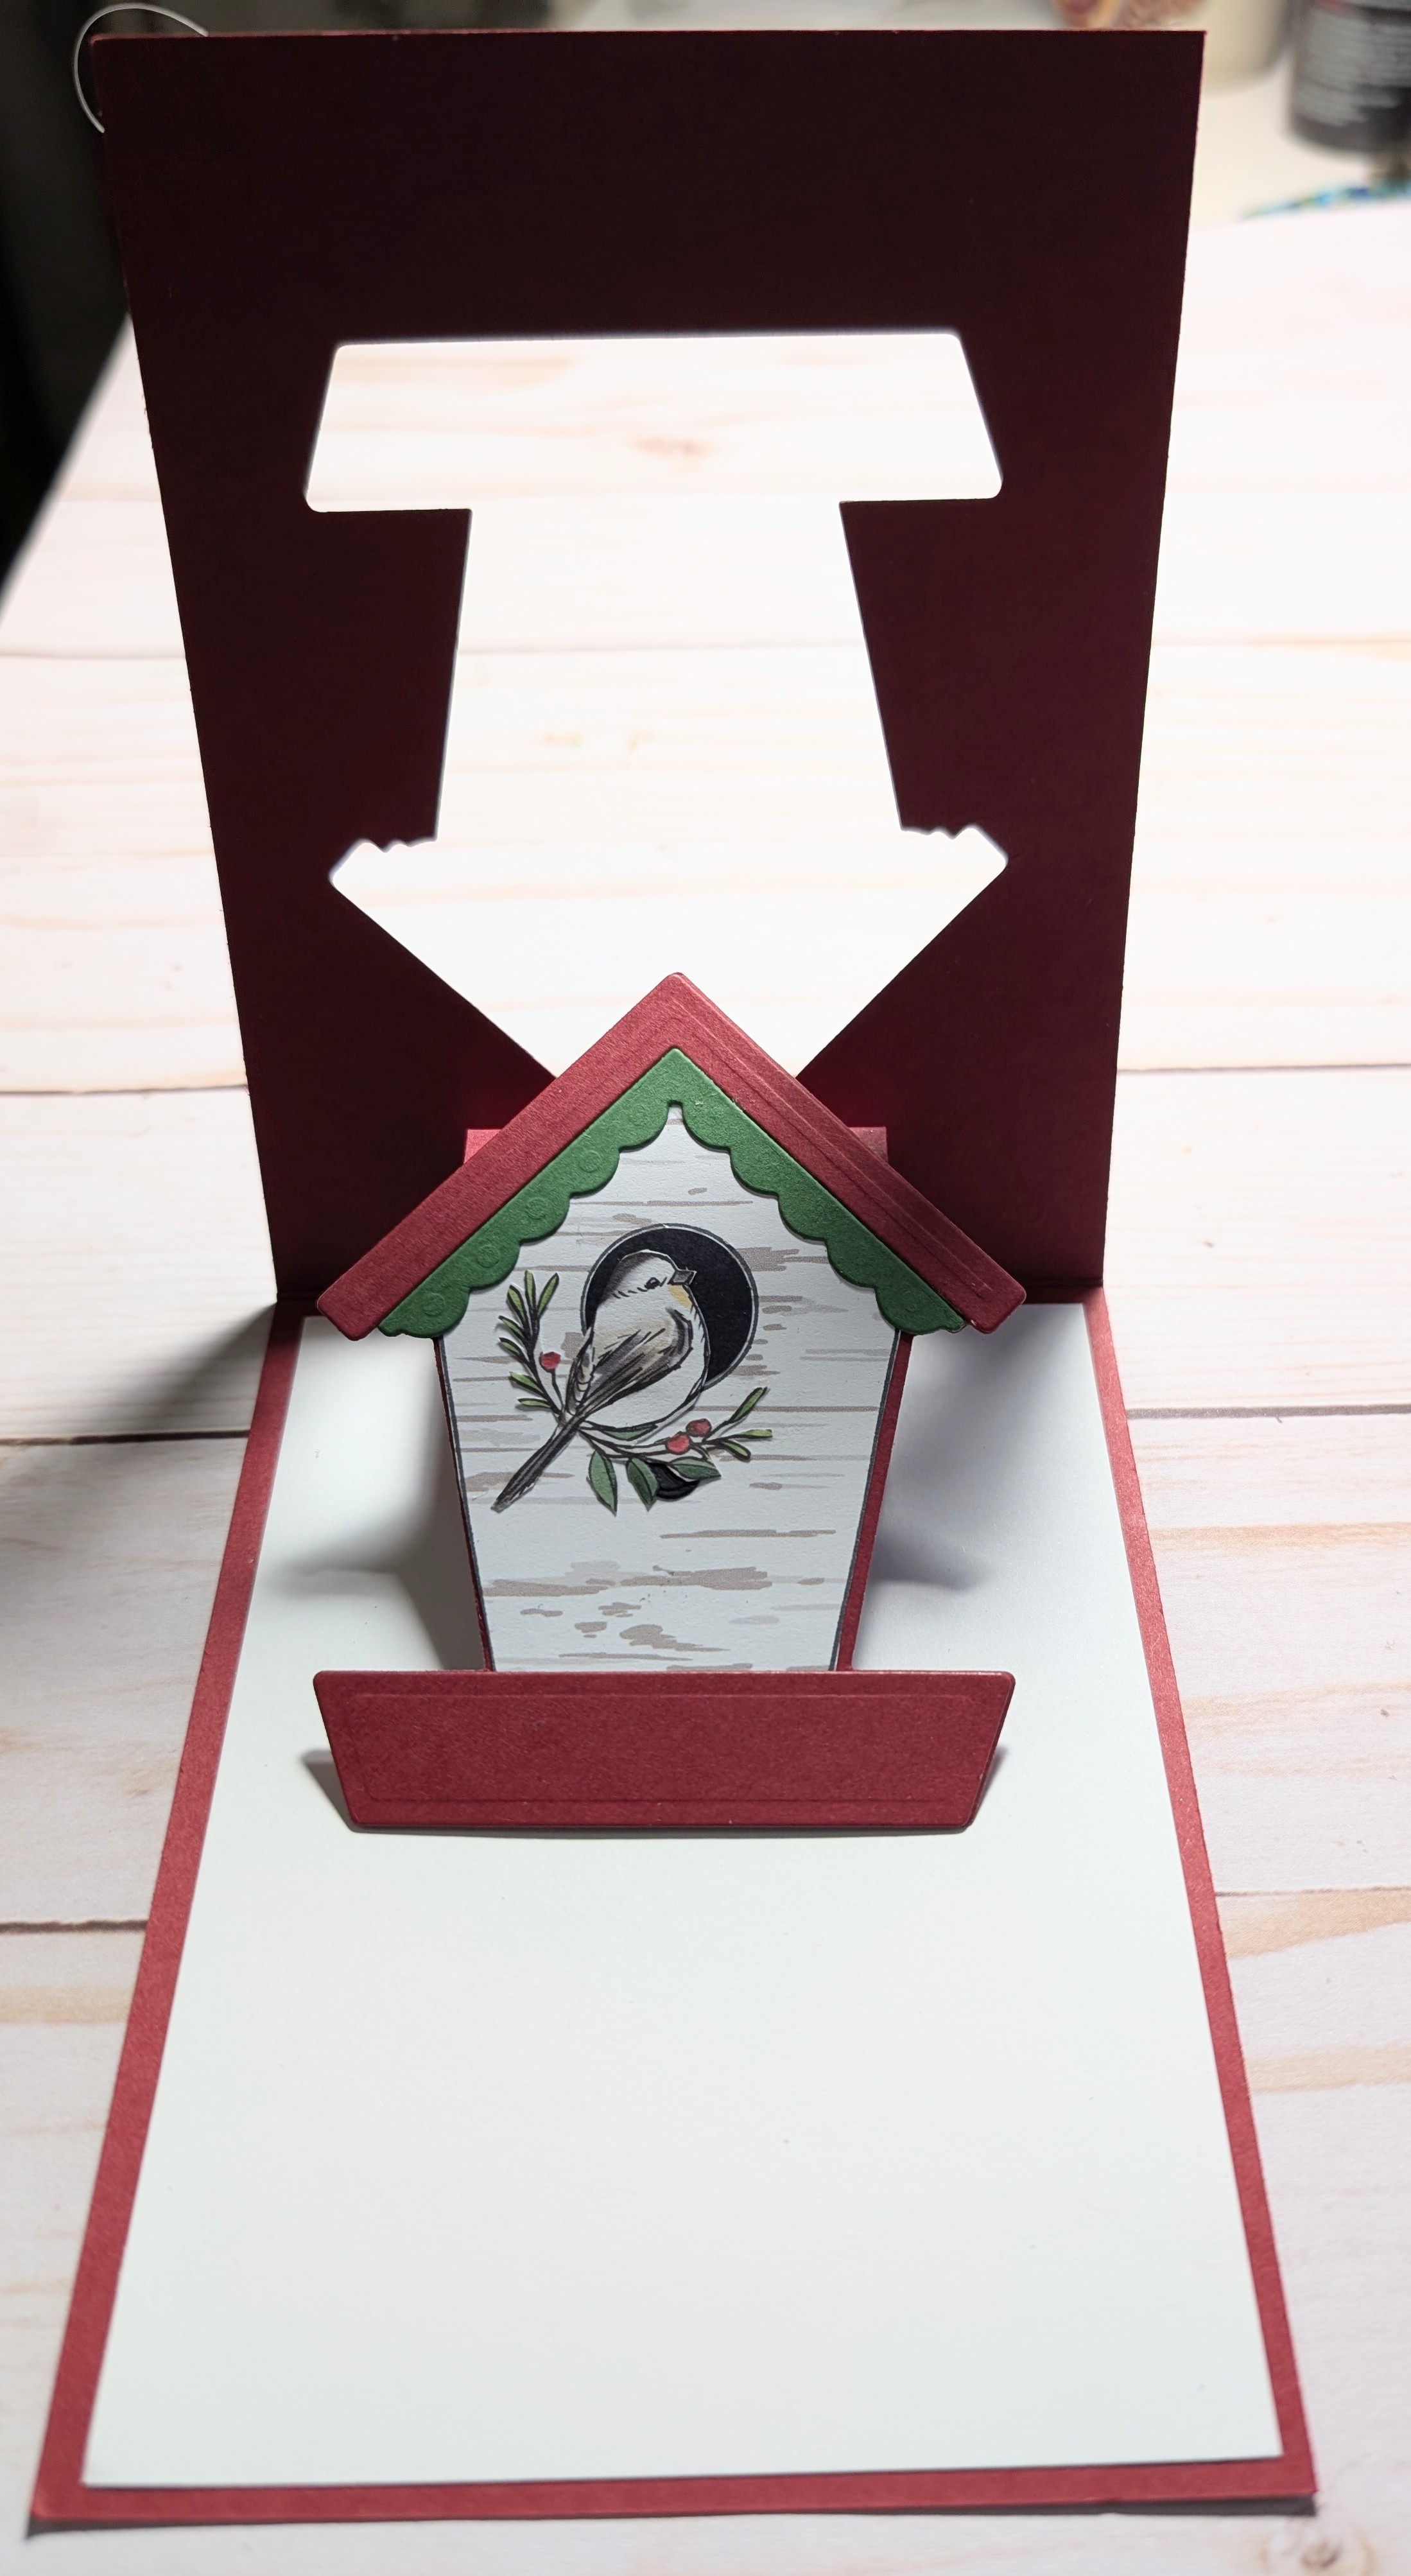
Three fun Christmas Cards made with the Hang an Ornament and the Truckin' Along bundles.
|
Stamps |
Hang an Ornament |
|
Paper |
Season of Elegance DSP, Pretty Peacock, Night of Navy, Basic White, Lost Lagoon, Early Espresso, Gold Foil |
|
Ink |
Night of Navy, Pretty Peacock, Lost Lagoon |
|
Embellishments |
Stampin Dimensionals |
|
Tools |
Hang an Ornament dies, Stitched Rectangles dies |
.png)

|
Stamps |
Hang an Ornament |
|
Paper |
Basic White, Seasons of Green and Gold DSP, Read Red, Gold Foil, Mossy Meadow, Garden Green, |
|
Ink |
Cherry Cobbler, Shaded Spruce, Old Olive |
|
Embellishments |
Stampin' Dimensionals |
|
Tools |
Hang an Ornament dies, Stitched Rectangles dies |

|
Stamps |
Truckin' Along, Peaceful Season |
|
Paper |
Basic Beige, Basic White, Balmy Blue, Tahitian Tide, Watercolor Paper, Basic Black |
|
Ink |
Stazon Black, VersaMark, Tahitian Tide, Old Olive, Watercolor Pencils |
|
Embellishments |
Stampin Dimensionals, |
|
Tools |
Truck punch, Water Painter Brush, Twisted Rope Embossing Folder |
.png)

Tag It Tuesday! We're making boxes of Christmas gift tags this month! They can be used as: a little gift, a hostess gift, at home for yourself, or you can "Elf" a couple neighbors. Have you ever been 'Elfed', 'Frosted', or 'Socked'? It's such a cute idea, to spread some love on your neighbors.
For Elf gifs you can:
Put your gift on neighbors front porch with a sign and directions for the neighbor:
You've been Frosted! https://app.box.com/s/swgul0ixb96kp6xx81l94j26039509sj
You've been Socked! https://app.box.com/s/dx3bajf1gbylsyg3p8qlikas2qksh9gx

Box of Tags


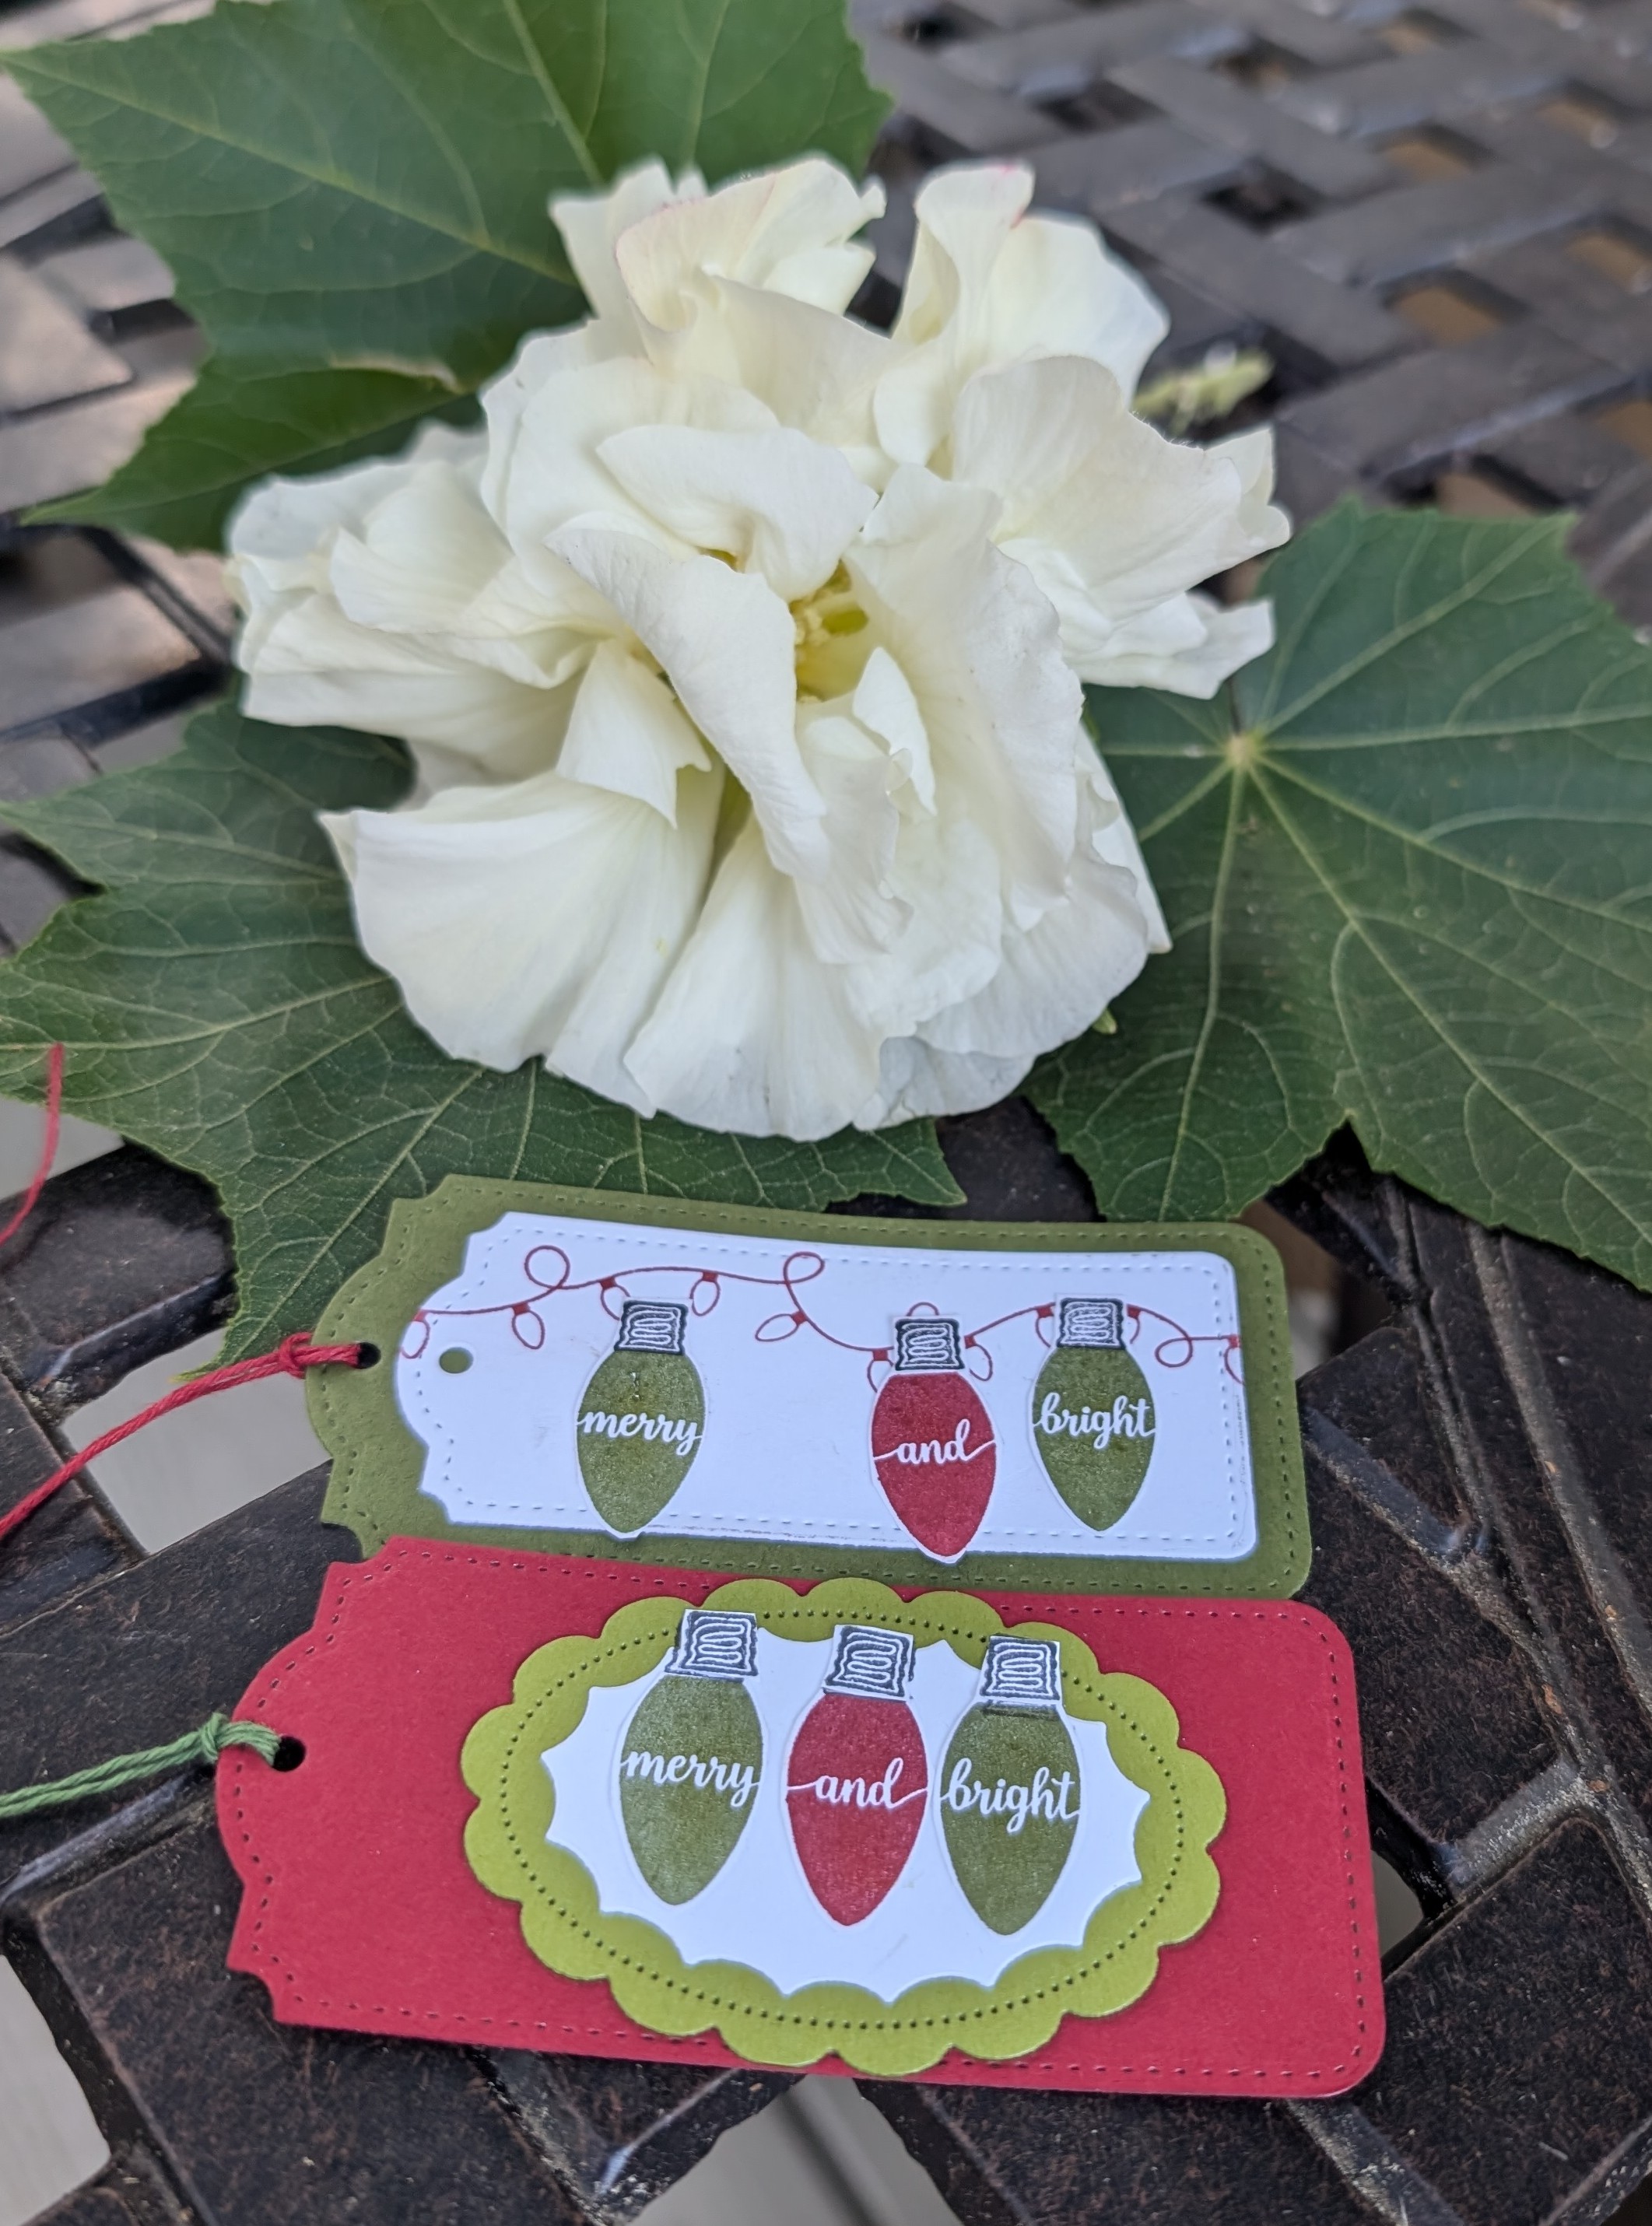


Materials:
Stamp Sets: Current: Peaceful Season, Forever Forest, Sophisticated Sled, Retired: Night In Bethlehem, Musical Season, For Unto Us, Making Christmas Bright, Poinsettia Petals, Shop The Town, Peaceful Pines
Ink Pads: a red, a green and a yellow/gold
Cardstocks: Cherry Cobbler, Crumb Cake, Basic White, Shaded Spruce, Old Olive, Garden Green
DSP (retired)
Die Sets: Unbounded Love, Swirling Snowflakes (retired), Tailor Made Tags (retired), poinsettias (off brand)
Punches:Tag Topper, Lightbulb, Merry Minis set
Bakers Twine
Embellishments
Preparation:
box piece cardstock 8-1/2 x 9 and cut up sides as shown #1
14 tags 2-1/4 x 4-1/4
handle - 1-1/2 x 8-1/2
Assembly:
It is important to note that you will need to snip on the 9" side. The folds won't work if you do it on the opposite side (along the 8-1/2 side)
.png)
Fold on score lines and burnish with bone folder to get crisp edges. Glue tabs in making sure to leave the largest tabs on the outside of the box so it looks nice.
Use Tag Topper punch to make the two cs tags. Use the punch on two DSP pieces to glue to one side of each cs tag.
Glue to the short ends of the box, then glue handle on the inside (behind tag).
Use embellishments and/or a bow to decorate the box.
Make 12 tags: If using Tag Topper punch, trim cs to 2 x 4 first. If using dies, grab paper and diecut:)
Here are the projects we're creating this month. Using Sophisticated Sled, Hang An Ornament and Spotlight on Nature.


.png)


Scrapbooking is another
way to meaningfully craft. Preserving memories in a scrapbook album
not only keeps your memories recorded and safe, it’s also a great
way to share your memories with family and friends! The potential to
strengthen relationships through scrapbooking is just one of the many
reasons that makes us so excited for this new scrapbookingbrochure.
As mentioned above this brochure is a companion to the Fall Holiday catalog, meaning products in the brochure beautifully complement and coordinate with some mini catalog products. You’ll also find exciting new product lines like Two-Tone Cardstock in Stampin’ Up! colors!
This is a digital-only scrapbooking brochure, full of scrapbooking essentials and exciting new products. The products inside coordinate with products from the mini
catalog (and some online only products, too!). With Workshop Kits and
some new product releases Two-Tone Cardstock, we hope
this adds variety and inspiration to your holiday crafts this year!
Happy Scrapbooking!
Here are the cards we're making in class this month. We're using Spotlight on Nature, Adventurous Sky and Lovely and Sweet. The new catalogs are here and you will be able to order from them beginning September 4th. Next month we will be making Christmas projects. I have a few items from the holiday catalog that came in my pre-order. I'll bring them to class for everyone to look at.
https://app.box.com/s/15ykpprrxuyclbp8vabmwa3h5x76w5o7


.png)
Here are three birthday cards we are making for the church staff to send to our Sensational Seniors. I hear such lovely compliments from the staff and those who have received cards that we make for them. I'm so blessed to have such wonderful ladies to come each month and create for this wonderful ministry.

.png)
Materials:
Stamp Sets: Unbounded Love, Flowers Of Beauty
Ink Pads: Blackberry Bliss, Basic Beige, Petunia Pop
Cardstocks: Thoughtful Journey DSP, Basic White, Basic Beige
Brick Stencils
Blending Brush
Mini Dimensionals
Classic Label Punch
Preparation:
Basic Beige 8-1/2 x 5-1/2 scored @ 4-1/4 (card base)
Basic White 3-5/8 x 4-7/8
Thoughtful Journey DSP 3-3/4 x 5
(2) Thoughtful Journey DSP 2 x 3-3/4 (diecut)
Basic White 1 x 3-1/4 (greeting)
Assemble Card:
Use Blending Brush and Basic Beige Ink with brick stencil on 3-5/8 x 4-7/8 Basic White cs
Glue stenciled background to DSP
Adhere those layers with Dimensionals to a Basic Beige card base
Stamp the sentiment “hello” in Blackberry Bliss Ink, cut with Unbounded Love Die, and attach with Dimensionals

.png)
Materials:
Stamp Sets: Adventurous Sky
Ink Pads: Night of Navy
Cardstocks: Basic White Thick, Night of Navy, Copper Clay, Gold Foil, Take To The Sky DSP
Stylish Shapes Dies
Preparation:
Thick Basic White 8-1/2 x 5-1/2 scored @ 4-1/4 (card base)
Night of Navy 4 x 5-1/4
Basic White 3-3/4 x 5
Copper pattern DSP 5 x 2-1/2
Copper Clay 3-1/4 x 3-1/4 (largest circle diecut)
Night of Navy 1-3/4 x 4 (fuselage)
Gold Foil 2 x 4 (wings/wheels & propeller)
Assemble Card:
Glue navy panel to white card front
Stamp rivet pattern on top right and bottom left of 3-3/4 x 5 Basic White panel, then glue to navy panel
Glue DSP to center of stamped white panel
Diecut largest circle from Copper Clay and stamp greeting in Night of Navy ink, then glue on center of DSP
Diecut fuselage in Navy cs and wings and propeller from gold foil
Glue plane pieces to Copper circle at upwards angle
Inside: stamp birthday in copper ink, sentiment in navy ink and plane in navy
.png)
.png)
Materials:
Stamp Sets: Simply Zinnias, Christian Birthdays
Ink Pads: Melon Mambo, Granny Apple Green
Cardstocks: Melon Mambo, Granny Apple Green, Basic White, Daffodil Delight, Lemon Lolly, Flowering Zinnias DSP
Zinnias 3D Embossing Folder
Preparation:
Granny Apple Green 8-1/2 x 5-1/2 scored @ 4-1/4 (card base)
Granny Apple Green 3 x 3-7/8
Basic White (2) 4 x 5-1/4 (one for inside, one for outside border layer)
Basic White 2-3/4 x 3-7/8 (embossed layer)
DSP (2) 1-1/4 x 3-7/8
Daffodil Delight 1 x 1 (oval center diecut)
Lemon Lolly 1-1/4 x 1-1/4 (center ring diecut)
Melon Mambo 2 x 4-1/4 (2 flowers diecut)
Melon Mambo 1 x 2 (buds diecut)
Granny Apple Green 2 x 4 (diecuts: leaf, stem, and bud stem/leaf)
Assemble Card:
Emboss 2-3/4 x 3-7/8 piece of Basic White with Zinnias EF
Diecut pieces and glue together
Glue white panel to card front and DSP to each end leaving border.
Glue embossed layer to Granny Apple layer then glue on top of DSP.
Glue flowers to embossed layer
Stamp greeting and glue to card front
Inside: stamp sentiment in Granny Apple and flower in Melon Mambo ink

Sales Period: 6–31 August 2024
See the flyer with photos and ordering information.
Our Designer Series Paper is hand created in house. Our artists design, sketch, paint, etc. the patterns you see on the paper. Its durability and utility are perfect for all types of paper crafts. See how our Designer Series Paper is created and the value it brings to your crafting experience.

Earning Period: 3–31 July 2024
Earn a $5 coupon for every $50 spent (before shipping and tax).
All coupon codes will be emailed right after a qualifying purchase has been made.
We encourage you to create an account on our online store.
If you earn multiple codes from a single order, you will receive one email with multiple codes. If you earn multiple codes from multiple orders, you will receive separate emails for each code earned.
All order types qualify for this promotion. Phone and email orders still require an email address.
Redemption Period: 1–31 August 2024
If using multiple codes, they must be separated by a space.
Coupon codes may be redeemed one time only.
Have you ever opened up a new stamp and die bundle, and felt excited as you thought of all the things you could make with it? Then sometimes reality sets in as you are only to be perplexed as you begin to realize you have no idea what this die is for, or how to use that stamp? This bundle really had me stumped! You can tells there is some two step stamping in this set but it a bimight be a bit of a challenge to determine what stamps and dies go together and how. I have two samples and some explanations for you today. I used the entire Unbounded Beauty Suite. The Flowers of Beauty bundle, the Unbounded Love bundle, the DSP, and In Color Glimmer paper. I used In Color Shimmer Gems instead of the In Color Resin Dots because .... who doesn't like a little bling?


 |
| The background stamp in Bubble Bath ink and the detail stamp in Petunia Pop ink. |
 |
| The die does not cut all the little flowers in one cluster, but in 6 clusters so you can glue them where ever you like to create a floral stem. |
 |
| The detail stamp in Mossy Meadow ink, background in Granny Apple Green ink then diecut |
 |
| The detail stamp in Mossy Meadow ink, background in Granny Apple Green ink then diecut |
 |
| This additional cluster pieces was stamped in the same colors as above |
 |
| Detail stamp in Petunia Pop ink, background in Bubble Bath ink and the additional center in Berry Burst ink. |
 |
 |
| Bubble Bath, Berry Burst, Petunia Pop ink pads |
 |
| These dies are the coolest thing! They cut a bunch of flowers all at once! |
 |
| After using an embossing tool to round and roll up the flower petals, I used the gems as the flower centers. |
