background

Saturday, January 31, 2015

Think Spring

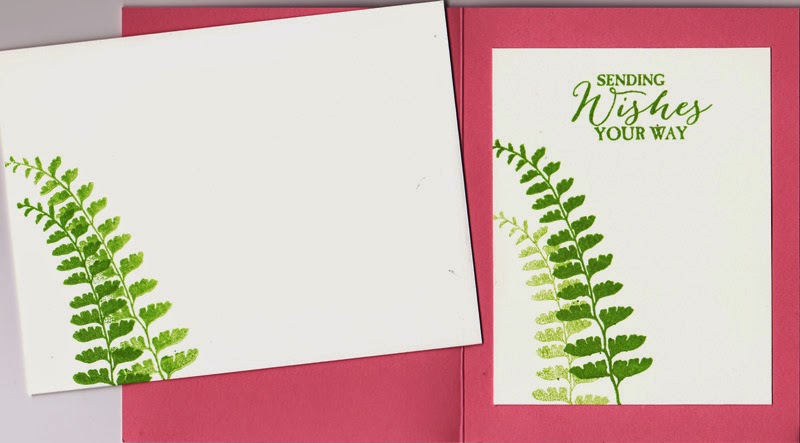
I absolutely ADORE this first stamp set!! Butterfly Basics is the most versatile and fun to create with. I enjoy stamping the insides and envelopes almost as much as the card fronts! lol

The second card was done using a set called Big Day and it is one of the things that you can get for FREE during the SALE-A-BRA-TION annual sale. For each $50.00 you spend, you can earn one FREE item from the SALE-A-BRA-TION catalog.

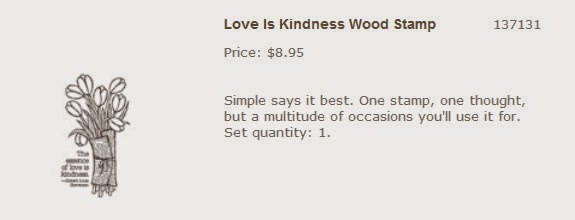
The last card was done with a stamp for the Ocassions Mini Catalog, called Love Is Kindness. Coloring this stamp with alcohol ink markers is sooo easy and fun, plus you can earn them for FREE during SALE-A-BRA-TION too!

Project Details
Stamps
Butterfly Basics
Card Stock & Papers
 Rich Razzleberry, Sahara Sand, Very Vanilla
Ink
Rich Razzleberry, Crumb Cake, Pear Pizzazz
Accessories
wax paper and dryer sheets:)
Tools
Butterflies Thinlets

http://www.stampinup.com/ECWeb/ProductDetails.aspx?productID=137154
This Stamp Set is available in Wood, Clear Mount or Photopolymer.
http://www.stampinup.com/ECWeb/ProductDetails.aspx?productID=138865
Get the die and stamp set as a bundle and SAVE 15%


Project Details
Stamps
 Big Day, Gorgeous Grunge
Card Stock & Papers
 Pacific Point, Tempting Turquoise, Whisper White
Ink
 Real Red, Pacific Point, Daffodil Delight, Tangerine Tango
Accessories
 Stampin' Dimensionals on the banner
Tools
 Banners Framelits


Project Details
Stamps
 Love Is Kindness, Painted Petals
Card Stock & Papers
 Soft Suede, Very Vanilla, Crumb Cake, Type Set Designer Series Paper
Ink
Menento Tuxedo Black
Accessories
Crumb Cake Ribbon, Alcohol Ink Markers, Venetian Crochet Trim
Tools
 Crop-A-Dile Corner Chomper- Cloud/Wave

http://www.stampinup.com/ECWeb/ProductDetails.aspx?productID=137131

Thursday, January 29, 2015

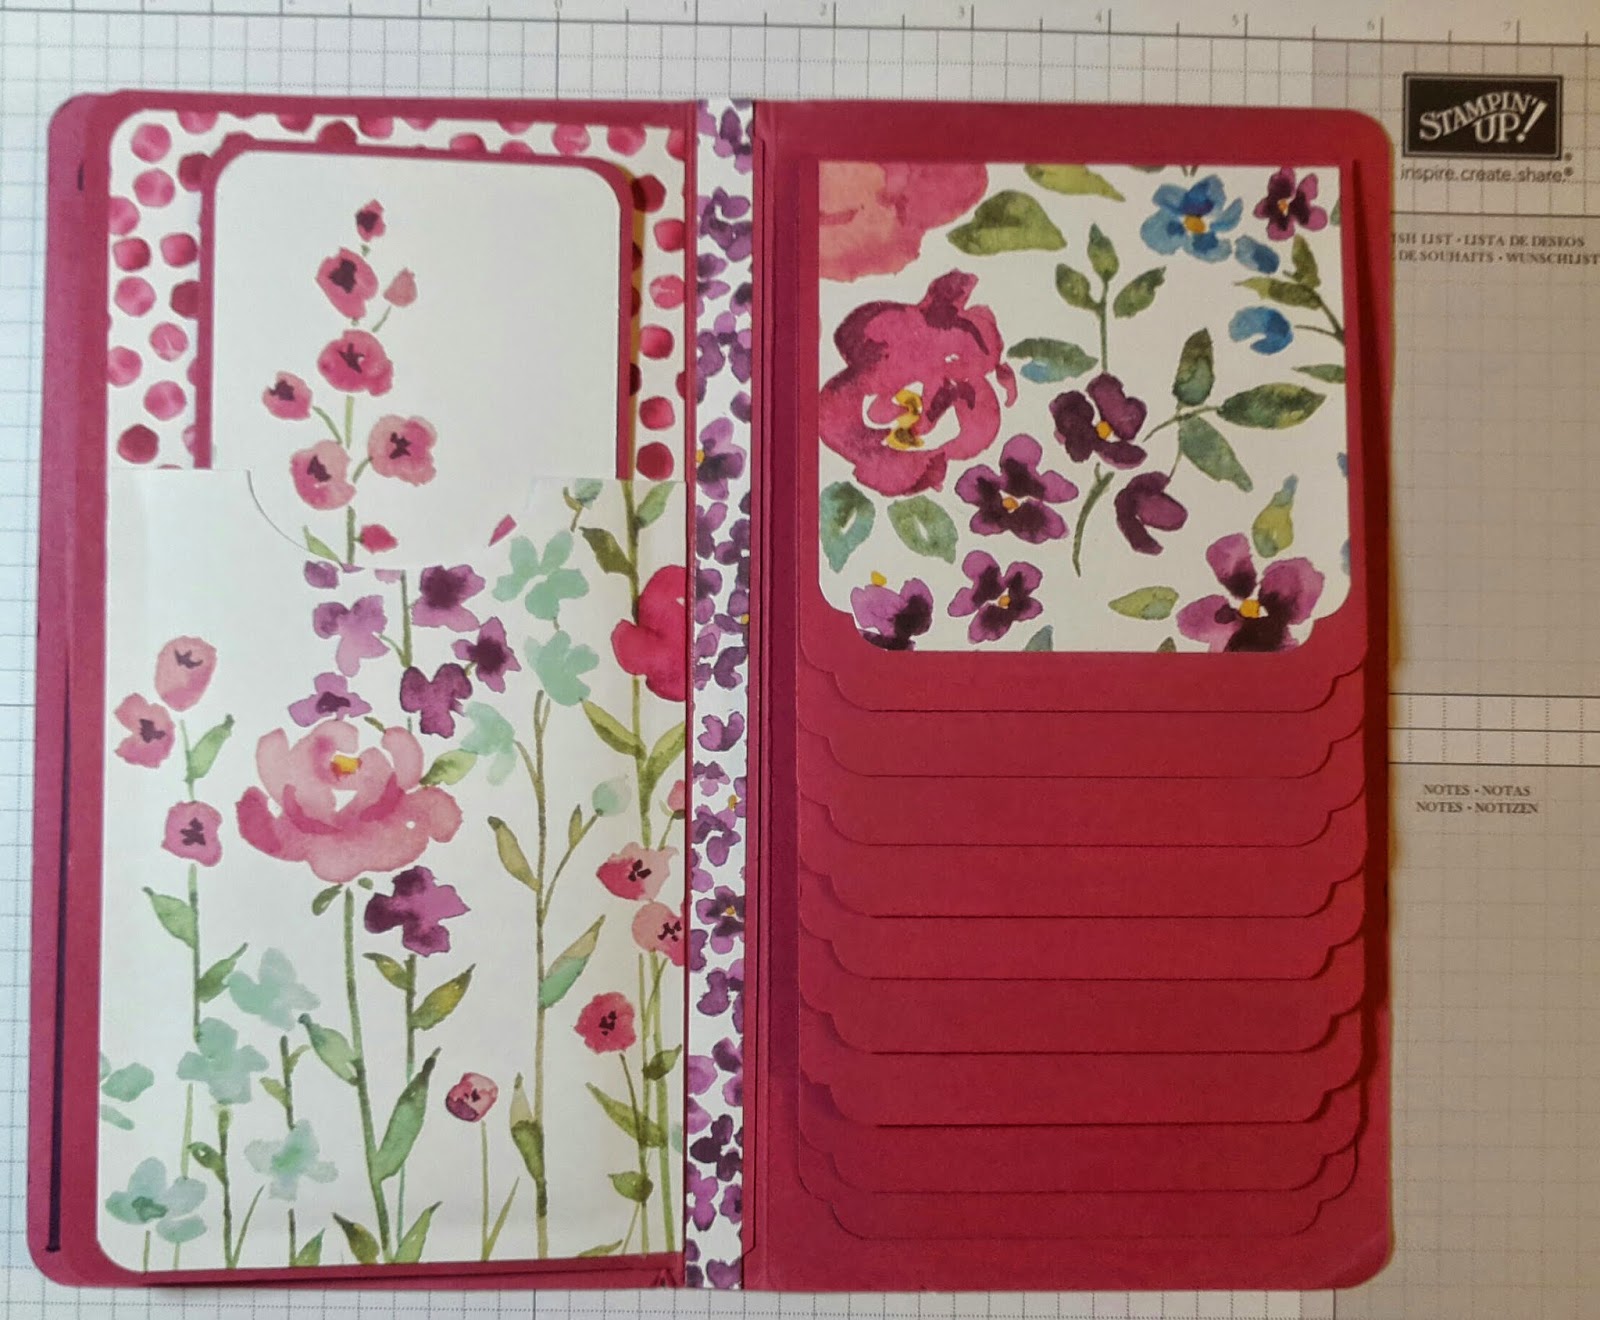
Blessing Book Three With Tutorial

This is the Blessing Book that my friend Beryl and I, will be showing some of the ladies in our Sisters' Bible Study, how to make.

Materials
7 sheets Cardstock, Rose, Red and Blackberry Bliss
6 sheets of 12 x12 Painted Blooms Designer Series Paper
SNAIL double stick tape dispenser (2 rolls) or glue
Sticky Tape (1 roll)
Corner Rounder punch and Crop A Dile - Scallop/Cloud Cut Corner Chomper
Ruled paper

Cover: Cut 8 ½” x 9 ¾” then on the 9 ¾” side, score at 4 ½” and 5 ¼”
               Cut two mats from patterned paper 4 ¼” x 8 ¼” and ½” x 8 ¼” for the spine

Page Insert in Spine:
  • Cut cardstock 8 ½” x 11,” and score at ½”
  • Insert in the middle inside spine and attach double sided tape on one side to attach page
  • Cut cardstock page 8 ¼” x 4 ¼” and attach to spine in previous step, then round corners 
Page One - Side pocket: 
  • Cut 5 ½” x 4 ½” on the 5 ½” side score at 5” then rotate and score at ½”   
  • For diagonal cut on pocket, on the 4 ½” side, pencil mark at 1 ¾” then rotate and put a mark at 3 ½” then cut from one tick mark to the other
  • Cut patterned paper for mat on the pocket 4 ¾” x 3 ¾”
  • Booklet inside the pocket: cut 7 ½” x 7 ¾”. On 7 ½” side, score at 3 ¾”. 
  • For booklet mats, cut four pieces of patterned paper 3 ½” x 7 ½” 

Page Two – Booklet Pocket:
  • Cover page with patterned paper 8” x 4”
  • Create a pocket by cutting patterned paper 8” x 2 ½” then adhere with double sided tape on three sides.
  • Create card for pocket by cutting cardstock 7” x 6 ½” and score in half at 3 ¼”  
  • Cut patterned paper mats for the four sides to the card at 6 ¾” x 3” 
  • Insert the back of the card in the pocket allowing the front to ‘hang out’ as a pretty flap.

Page Three - Top Pocket:
  • Cover page with patterned paper 8” x 4”
  • Make a pocket with a piece of patterned paper cut 5 ½” x 4” make a finger opening with the oval punch. 
  • Secure to the page on three sides with double sided tape.
  • For the booklet to fit inside the pocket, cut cardstock   6” x 7 ½” and score in half at 3.” Round all four corners for easier insertion.
  • Cut four pieces of patterned paper for mats 2 ¾” x 7 ¼”

Page Four - Waterfall Flaps:
  • Base piece of cs 7 ¾”x 4” (decorative corners on bottom)
  • Flaps cut 8 pieces that are 4” x 4 ½” score at 4” (decorative corners on bottom of each one)
  • Tape on ½” flaps
  • Start on top line up at top and sides then stick down
  • Line up each subsequent flap just below the previous one right up to the edge  
  • Patterned paper for flaps: Cut eight for fronts 3 2/8” x 3 ¾” and punch two decorative corners on bottoms of each; Cut eight for backs 3 ¾” x 3 ¾” and punch two decorative corners on tops of each.

Kissing Technique -- Stampin' Up!


I did this with the ladies in Card Ministry at our Church a while back and they loved it. It's such fun and soooo easy!

A Plethora of Colored Images

A couple of these cards were done this week with my new stamps, the others have been in my "to finish" tray. Do you have one of those? Let me guess, it collects things doesn't it? Things you don't even remember putting in there. I fished out 4 images from my "to finish" tray and made the cards very quickly. I need to search through that tray more often! As anyone who knows me, or follows my blog will tell you, I simply adore coloring. I often sit and color with my alcohol ink markers while watching TV with my husband at night.
Project Details
Stamps
 Love is Kindness, French Foliage (retired)
Card Stock & Papers
Soft Suede, Blushing Bride, Typeset Designer Series Paper
Ink
Memento Tuxedo Black, Soft Suede, Crumb Cake
Accessories
Alcohol Ink Markers
Tools
 Sponge Daubers, sponges

Project Details
Stamps
Frogs from Cornish Heritiage Farms
Card Stock & Papers
Garden Green, Always Artichoke, Old Olive
Ink
Memento Tuxedo Black
Accessories
Alcohol Ink Markers
Tools


Project Details
Stamps
"Mermaid" from Saturated Canary
Card Stock & Papers
Old Olive, Pool Party, Lost Lagoon
Ink
Memento Tuxedo Black
Accessories
Alcohol Ink Markers
Tools


Project Details
Stamps
Love Is Kindness, French Foliage (retired)
Card Stock & Papers
Real Red, Typeset Designer Series Paper
Ink
Memento Tuxedo Black, Crumb Cake, Soft Suede
Accessories
Alcohol Ink Markers, Linen Thread
Tools


Project Details
Stamps
Bouquet Toss
Card Stock & Papers
Baked Brown Sugar, Cherry Cobbler
Ink
Memento Tuxedo Black
Accessories
Alcohol Ink Markers
Tools
Labels Framelits

Project Details
Stamps
'What The Librarian Reads' from Saturated Canary
Card Stock & Papers
Crisp Cantaloupe, Pistachio, Calypso Coral
Ink
Memento Tuxedo Black
Accessories
Alcohol Ink Markers, SU Fabric Brad (retired) It's covering an ink blob!
Tools
Decorative Dots and Fancy Fan Embossing Folders, Corner Rounder

Tuesday, January 27, 2015

Technique Tuesday!

Here is fun technique for y'all to try:)


Click Here to order
Stampin' Spritzer
126185     Price: $2.95
Fill this empty bottle with liquid and any color of Classic Stampin’ Ink. 2 bottles.


Alcohol Ink Markers Are Awesome!

Whether I use Copic or Blendabilities by Stampin' Up! I simply adore coloring these pretty images!! I need to beef up my stash of Get Well and Birthday cards. I send out a ton of cards, for every reason. I love making them, and I know that people really enjoy getting something that I made just for them. It brings a smile to their faces to know that someone cares enough to send something special to them.

Project Details
Stamps
 Love Is Kindness, Thoughts and Prayers, Painted Petals
Card Stock & Papers
 Basic Black, Whisper White
Ink
 Wild Wasabi, Rose Red,  Memento Tuxedo Black
Accessories
 Melon Mambo Taffeta Ribbon, Alcohol Ink Markers
Tools
 Beautifully Baroque Embossing Folder

Project Details
Stamps
 Love Is Kindness
Card Stock & Papers
 Rose Red, Whisper White, Painted Petals Designer Series Paper
Ink
 Memento Tuxedo Black
Accessories
Alcohol Ink Markers
Tools


Project Details
Stamps
 Indescribable Gift, Butterfly Basics
Card Stock & Papers
 Blushing Bride, Whisper White, Wild Wasabi
Ink
  Memento Tuxedo Black, Wild Wasabi
Accessories
 Whisper White Organza Ribbon
Tools

Getting Clear Mount Stamps to Stick to the Blocks

I love clear-mount stamps, they are so much easier to store and they are less expensive than wood mount stamps. Getting them to cling to the blocks can sometimes be tricky, especially in a humid climate. Luckily, I’ve got some great tips. Start by making sure the block is clean; cleaning them with the Clear Block Cleaning Cloth (item 121779, $3.95) OR rubbing alcohol or glass cleaner works great. Once your block is squeaky clean, apply the stamp to the block firmly – you can’t damage the stamp or the block, so push hard for three full seconds. You can tell if you pushed hard enough by turning the block over (rubber side down) and looking at the air bubbles. If the air bubbles are flat, you’re good. If they’re still nice and round, push harder until those bubbles flatten out.

If the stamp is still not sticking, try these quick fixes:
  • Create a bit of static electricity by rubbing the block and back of your stamp quickly a few times on your pants or shirt sleeve.
  • Apply just a little squiggle of 2-Way Glue (item 100425) on the label of the stamp and let it dry completely. It dries clear but is a little tacky, which helps the stamp stick to the block better.
  • Because the foam on the clear stamps has a stronger cling than the label, trim around the image on the sticker as close as you can before you peel off the paper, exposing the foam around the edges when the sticker is adhered.
  • Or, you can use the stamps totally without labels. This only works on stamps that you haven’t labeled though. If you’ve already labeled your stamps, don’t try to pull the label off; you’ll damage the stamp and the label!
Here is a good video from a Demo across the pond.

Monday, January 26, 2015

Punch and Die Combo

I love it when a punch or die can be used in a different way to create a whole new look! In this case, I took a piece of cardstock a little larger than the size oval I wanted, then put it in my Tag Topper Punch. The result looks like the first picture below the card description. Then I slid an oval framelit under the scallop bit produced by the punch and over the rest of the cardstock. The result of this step is shown in the second picture below the description. I evened up the oval and ran it through my Big Shot. Voila! I got a new die cut shape!!
Project Details
Stamps
 Bouquet Toss, Teeny Tiny Wishes
Card Stock & Papers
 Blushing Bride, Melon Mambo, Whisper White
Ink
 Melon Mambo, Memento Tuxedo Black
Accessories
 Alcohol Ink Markers, Melon Mambo Taffeta Ribbon
Tools
Lovely Lace Embossing Folder, Tag Topper Punch, Ovals Framelits, Word Window and Modern Label Punches
 

Project Details
Stamps
 Bloom With Hope, Blooming With Kindness
Card Stock & Papers
 Pumpkin Pie, Whisper White
Ink
 MementoTuxedo Black
Accessories
Alcohol Ink Markers, Pumpkin Pie Chevron Ribbon, Linen Thread
Tools
Tag Topper Punch, Honeycomb Embossing Folder

Project Details
Stamps
 Love Is Kindness, Butterfly Basics
Card Stock & Papers
 Blushing Bride, Crisp Cantaloupe, Whisper White
Ink
 Blushing Bride, Crisp Cantaloupe, Pear Pizzazz, Sahara Sand
Accessories
 Crisp Cantaloupe Twine (retired), Stampin' Dimensionals, Alcohol Ink Markers
Tools


Project Details
Stamps
 Butterfly Basics, Gorgeous Grunge, Happy Watercolor (greetings)
Card Stock & Papers
 Very Vanilla, Crumb Cake, Crisp Cantaloupe
Ink
 Hello Honey, Wild Wasabi, Crumb Cake, Crisp Cantaloupe
Accessories
 button, Early Espresso Baker's Twine, Washi Tape (retired patterns), scrap of burlap
Tools
 Butterflies Thinlits Die, Spiral Border Punch