background

Showing posts with label Mystery Stamping. Show all posts

Thursday, July 24, 2025

Mystery Stamping #5 CLUES


Here are the clues to next weeks Mystery #5 Stamping Event 

Clue #1 This is not a fun fold

Clue #2  5-1/2" x 8-1/2" score @4-1/4 (card base)

Clue #3  DSP 4-1/4" x 5-1/2" (vertical layer)

Clue #4  Cardstock: 3-1/2 x 4-3/4" (vertical layer)

Clue #5  DSP: 1-3/4" x 4-1/4" (horizontal layer)

Clue #6 Basic White: 2-1/2" x 3-3/4" (stamped layer)

Monday, July 14, 2025

Mystery Stamping #4 SOLVED!

 The clues to this mystery were given on Thursday, and here is the solution! This fun fold is quick and easy! Instead of stamping images, I fussy cut flowers from the patterned paper, then used Stampin' Dimensionals to pop them up.  I love how it turned out! This card has a pocket for the sentiment, where you could also put a gift card. A link to the PDF tutorial and the video tutorial are below.


PDF Tutorial: https://app.box.com/s/cu4mheyqxn7weysfmsry0d5ygm71byau


Monday, June 30, 2025

Mystery Stamping #3 SOLVED


This is the fun layout for this week's Mystery Stamping. There are a couple of examples below as well the video showing just how to put the clues together. I hope you had fun playing along this week. I'll be back next Monday with another video tutorial and the following week with another Mystery Stamping. I'd love to have you choose me as your demonstrator. 


Wednesday, June 25, 2025

Mystery Stamping #3


PRINTABLE COPY OF CLUES

Clue #1 Locate the following:

  • Patterned Paper (the main print)
  • Patterned Paper (subdued print)
  • two colors of cardstock (color A and color B)
  • Basic White cardstock
  • Paper Trimmer
  • Adhesive of choice
  • Greeting and sentiment stamps

Clue #2 cut cardstock color A 8-1/2 x -5-1/2 score @ 4-1/4. This card base opens on the bottom and the fold is on the top.

Clue #3 cut a 4" x 5-1/4" piece of Basic White card stock for the inside

Clue #4 The large background layer is patterned paper 4" x 5-1/4" (subtle pattern). Then adhere it to the card base.

Clue #5 Cut Basic White cardstock 4-1/4" x 2-1/4" mat it to 4-1/2" x 2-1/2" cardstock color A.

Clue #6 Patterned Paper 2-1/2" x 2-1/2" (the main print) mat it to 2-3/4" x 2-3/4" cardstock color A.

Clue #7 Basic White 1" x 1." Rotate so that it is in a diamond position and stamp greeting on it. Then mat to 1-1/4" x 1-1/4" cardstock color A.

Clue #8 Cut cardstock color B 2-1/2" x 2-1/2" and mat it to cardstock color A 2-3/4" x 2-3/4"

Clue #9 Tape the matted Basic White layer first; about 1/2" from each edge and the bottom and a smidge closer to the left edge of the patterned paper.

Clue #10 Adhere the color B matted layer. Rotate the square so that it is a diamond shape. The top and bottom points are just a hair below the edge of the patterned paper layer, with the left point touching the edge of the patterned paper.

Clue #11 Adhere the matted patterned paper next. Align the left edge so that it is touching the far edge of the diamond on left side of the top and bottom points. You should see about 1/4” of the white layer below and about 1/2” of white to the right.

Clue #12 Orient the 1” square of white cardstock and mat to 1-1/4” square color A. Adhere with dimensionals so that the left tip of the diamond is inside the larger diamond shape, leaving an equal amount of the larger diamond as a border on the left side.


Monday, June 16, 2025

Mystery Stamping #2 SOLVED


This is the Mini Flap Fold. There is an example below as well the video showing just how to put the clues together. I hope you had fun playing along this week. I'll be back next Monday with another video tutorial and the following week with another Mystery Stamping. I'd love to have you choose me as your demonstrator.


Chick Here to SHOP WITH ME


Wednesday, June 11, 2025

Mystery Stamping #2


It's that time again! Are you ready to get your sleuth on? Grab your stamping supplies and let's make something!

Remember, don't stress, there is no worrying allowed lol! Just have fun and roll with it. You will come up with something pretty! It doesn't matter if it looks like mine, because I'm going to show you how to make it when we 'solve' the mystery. So if you card is different than mine, you will have two new card designs, how cool is that?

Don't forget to come back to my blog or YouTube channel on Monday to 'solve the mystery.'

Printable Clues

Clue #1 Locate the following:

  • Trimmer w/scoring blade
  • Bone Folder
  • Paper Snips
  • Stamp set/s with coordinating dies if you like
  • 2 patterns Designer Series Paper (DSP)
  • Ink pads that coordinate with the DSP
  • Cardstock colors that coordinate with the DSP as well as Basic White or Beige
  • Stylish Shapes Dies or any other shapes that are approximately 2-1/4" wide
  • Adhesives
  • Embellishments of your choice

Clue #2 Cut card base 5-1/2″ x 4-1/4″ from cardstock that coordinates with DSP

Clue #3 Adhere 4″ x 5-1/4″ DSP pattern A to front of card base.

Clue #4 Cut 4-1/4″ x 5-1/2″ cs score @ 3-1/4″ on long side. Fold on score line; burnish well with bone folder to make a small card

Clue #5 Cut DSP pattern B 2″ x 4″ adhere to left front of small card

Clue #6 Cut DSP pattern B 3″ x 4″ adhere to inside small card

Clue #7 Adhere the small card to the center of the card base

Clue #8 Diecut two 2nd largest squares from Stylish Shapes Dies on 6″ x 3″ cardstock. You can use any other shape in place of dies, if desired

Clue #9 Stamp greeting on one of the square diecuts and sentiment for inside on the other square.

Clue #10 Adhere one square diecut to center of small card front (right side will hang off edge).

Clue #11 Adhere other square diecut inside of small card so that both squares align with each another.

Clue #12 Embellish with coordinating diecuts, stamped images, gems etc.


Monday, June 9, 2025

Mystery Stamping #1 SOLVED


This is the Triple Panel Fold. There are three examples below as well the video showing just how to put the clues together. I hope you had fun playing along this week. I'll be back on Thursday with another Mystery Stamping. If you are interested in purchasing any of the products used in these samples, I've listed links to my online store below each one. I'd love to have you choose me as your demonstrator.
Textured Notes Bundle and Woven Textures DSP
https://www.stampinup.com/products/textured-notes-bundle-english
https://www.stampinup.com/products/woven-textures-12-x-12-30-5-x-30-5-cm-designer-series-paper
Gallery Blooms Bundle, Beautiful Gallery DSP, Pressed Flower Motifs
https://www.stampinup.com/products/gallery-blooms-bundle
https://www.stampinup.com/products/beautiful-gallery-6-x-6-15-2-x-15-2-cm-designer-series-paper
https://www.stampinup.com/search/pressed%20flower%20motifs?sort=relevance&ts=1749509781534


Inspiring Imperfections Bundle, Kintsugi Inspirations DSP, Flower Accents


Chick Here to SHOP WITH ME

Saturday, June 7, 2025

Mystery Stamping!


Do you like making fun fold cards? How are you at following clues? You should play along with my first Mystery Stamping event!

If you’ve never seen a mystery stamping presentation before, it’s a lot of fun. You create with the supplies in your craft room by following a series of step-by-step clues that are put before you. You simply need to think outside the box using the supplies you have on hand. There’s no right or wrong in Mystery Stamping—only endless possibilities.

Sound mysterious??? Get ready to solve the mystery. Go into your crafting space and follow the clues to design a card. Then tune in on Monday to see samples of finished versions of this fun mystery stamping card. And thanks for tuning in!

How do I get started with Mystery Stamping?

  1. Make sure you subscribe to my channel and click the bell icon so that you get notified when a new video posts.

  2. Every FRIDAY I will post the clues. You will get an email if you sign up for my newsletter and/or visit my blog to get the clues.

  3. Join me Monday on YouTube to solve the mystery.


Mystery Stamping June 7, 2025            Printable copy HERE

Clue #1:

  • Trimmer w/scoring blade
  • Bone Folder
  • Paper Snips
  • Stamp set/s with coordinating dies if you like
  • Designer Series Paper of your choice (DSP)
  • Ink pads that coordinate with the DSP
  • Cardstock colors that coordinate with the DSP as well as Basic White or Beige
  • Adhesives
  • Embellishments of your choice

Clue #2: This will be a landscape style card with the opening on the bottom. Cut and prep initial pieces.

Clue #3 The card base cut 4-1/4" x 5."

Clue #4 Cut Designer Series Paper 4" x 5-1/4" adhere to card base.

Clue #5 Basic White or Beige cs cut 4" x 11" score @ 3-3/4" and 7-1/2."

Clue #6 In the portrait position, with the largest section at the top, fold the score line closest to the bottom up toward the top. Then fold the score line closest to the top down towards the bottom. Close the flaps, and you will open them in this manner: open the first flap up, and the next flap down.

Clue #7 Adhere the the panel fold you just made to the card front so that the largest panel is on the top/front, with an even border on the top, right and bottom edges.

Clue #8 Cut DSP 3-3/4" x 3-1/2" and adhere to the top panel (the largest one).

Clue #9 Cut DSP 3-3/4" x 3-1/4" and adhere to the outside of the the panel that has an opening at the top. (After opening the first panel up, you see the second panel which you will open down. This is the one that gets this size DSP.)

Clue #10 Cut cardstock 3-3/4" x 7/8" and adhere to the left side of the card front, so that there is an equal border at the top, left, and bottom edges. There will also be a border to the right between this piece and the three panel fold.

Clue #11 Cut DSP 3/4" x 3-5/8" and adhere to the skinny little cardstock panel on the card front.

Clue #12 Turn the card base over and on the back, adhere a 4" x 5-1/4" piece of Basic White cardstock to the back of the card base. Then cut a 1" x 4" piece of DSP and adhere it to the left side of the white layer.

Clue #13 Stamp greeting and sentiment, any images and diecuts that you'd like to embellish your card.

Mystery Stamping #1 Video


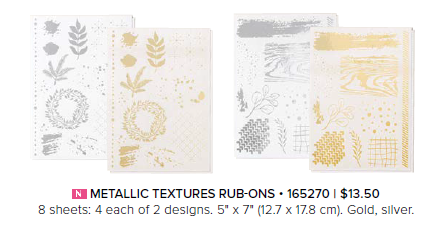
These are the Rub-Ons I showed in the video

Chick Here to SHOP WITH ME