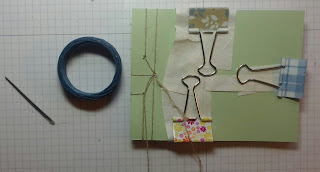
This is not hard to do, I promise. When I was teaching 5th grade gifted and talented students, I had small classes of 15, which enabled me to do a lot of projects with them. When the children were studying poetry, I taught them how to make these books to keep their poetry in. We made our own marbled paper and the books were so beautiful!
Tutorial- Japanese Stab Binding
10 pieces of text-weight paper, 4 x 10 ½ inches
2 pieces of cardstock, 4 ¼ x 11
inches
Piece of coordinating art paper
like mulberry, approximately 4 ¼ x 2 inches
Scraps of cardstock, to protect the
cover when clamping
Craft glue, sheet of double-stick
adhesive, or xyron
34 inches of waxed linen thread,
cord, ribbon, or other thick thread (metallic looks great)
Beads with a large enough hole to
hold the thread
Jump rings or bras wire to make
your own
Charms, beads, etc. anything to
dangle from the book
Scoring tool
Small brush with water
Three small binder clips
Ruler
Pencil
Awl
Blunt large-eyed needle (tapestry
needle)
Needle-nose pliers
NOTE: waxed linen thread works
best, but I have used many other types of thread and had success.
1. Fold the paper pieces and the cardstock
pieces in half. The cardstock should be 4 ½ inches high x 5 ½ inches wide.
Stack the text pieces into a neat stack inside the cover pieces with the folds
of the covers at the fore edge and the folds on the text pieces at the spine.
In other words, the folds on the cardstock will be toward the open part of the
book. The folds on the text pieces will be toward the binding. Score the cover
1 inch away from the spine (the open side, not the folded side) to ease the
opening. Set aside.
2. Use a small brush dipped in water and a
ruler to “mark” a waterline along the long edges of the decorative art paper.
3. Let the water soak in a few moments and
tear off the paper along the edges, giving it a feathered appearance. Allow to
dry.
4. Clamp the book stack on the top, bottom,
and fore edge with the binder clips. Keep the book stack clamped until the book
is stitched. When dry, glue the paper to the front cover and fold the paper
around the spine to the back cover. Glue this also and let dry.
5. On the back of the book stack, 3/8 inch
(1 cm) from the spine edge, mark hole placement at
·
1 ½ inches (3.8 cm) and 2 3/.4
inches (7 cm) from the bottom edge
·
Mark another hole at ¾ inches (2
cm) from the spine and
·
2 1/8 inches (5.5 cm) from the
bottom edge.
6. Using your chosen needle
and your chosen thread, cord or ribbon,
start on the front of the book and go through hole 1to
the back of the book, and leave a tail of thread about 5 inches long. On the
back, come around the spine to the front
and through hole 1 to the back of the book
7. On the back of the book, go
through hole 2 to the front of the book, around the spine to the back of
the book
and through the same hole. One the front of the book go around the top edge of
the book to the back and through the same hole to the front.
8. On the front, go through
hole 1 to the back. On the back, go around the top of the book to the front and through hole 1 to the
back.
9. On the back, go through
hole 3 to the front and around the spine to the back and up through hole 3
again. On the front, go around the bottom edge to the back and through the same
hole to the front. On the front, go through hole 1 to the back.
10. On the back, go around the
bottom edge to the front. Stitch the thread underneath the center stitch
(rather than going through
the hole) to anchor the thread and tie the thread off in a square knot using
both ends of the thread.


