background

Showing posts with label Christmas. Show all posts

Saturday, December 29, 2012

Sneak Peeks & Other Stuff

Well, I'm one happy girl because today I was able to sit at my desk long enough to make a card! This card is made from Sale-a-Bration items.
 I made this thank  you card right before I had surgery, so I haven't had a chance to post it until now. The stamp set is From My Heart, designer paper is Twitterpatted, I used the pleated ribbon that's on the Clearance Rack right now, Lacy Fan embossing folder, Antique brads and the new lace tape from the Spring catalog.
These are some of the tags I made for my family's gifts.


Wednesday, December 19, 2012

Tuesday, December 18, 2012

More Gift Packaging

Here are a couple more gift packaging ideas. These are for my BFF Barb. She loves taking care of the yard and flowers. She's got the green thumb I wish I had:) I looked at some directions for making poinsettias with punches, but they used that 'other brand' that looked like a leaf. So, I looked at my new Five Petal Punch and thought it would do quite nicely. I put veins on the petals with my stylus. The smaller petals are adhered with a dimensional and finished off with pearls. I drew the pot on a piece of computer paper to get it the right size and proportions before making it from a sheet of crumb cake card stock. I sponged the edges with soft suede. The greeting is from the new spring catalog. The stamp set is called, "That's the Ticket" and was punched out with the ticket punch.

The second one is a bag I made from card stock and put the gift inside. Last is an ornament made from the Keepsake Ornament bundle.
These are the bags I made for my Secret Sister. I bought presents then made these bags to put them in. I'd never made anything like these before and this is what got me started making packaging for Christmas gifts. I had such fun making them for Nancy.
 I sure wish I'd seen this kiss tree in time to make some for the craft show. Next year I'll make some, cause I think they are sooo cute! The design and directions are from Brenda Quintana Link to her tutorial.

Sunday, December 9, 2012

Christmas Cards

I have two Christmas cards to share with you today. I just finished the one below, and the second one we did in Stamp Club yesterday.

Project Details
Stamps
Snow Swirled
Cardstock & Papers
Whisper White, Sahara Sand
Ink
Sahara Sand, white craft ink
Accessories
Very Vanilla ribbon, Basic Jewels Rhinestones
Tools
XL oval punch

Outside of the card
Outside of card with flap open
Inside of card


Project Details
Stamps
Joyous Celebrations, Christmas Lodge, Delightful Decorations
Cardstock & Papers
Festival of Prints Designer Series Paper Stack, Very Vanilla, Soft Suede
Ink
Old Olive, Cherry Cobbler, Soft Suede
Accessories
Cherry Cobbler twine, Stampin’ Dimensionals, markers: Old Olive, Cherry Cobbler, Soft Suede
Tools
Mitten builder punch,  ½ inch circle punch, circle from Itty Bitty Shapes punch pack, Holiday Frame embossing folder

Sunday, November 11, 2012

Hostess Club Project

We had such fun making this, I just had to share it with y'all.


Project Details
Stamps
Christmas Lodge, Evergreen
Cardstock & Papers
Whisper White, Crumb Cake, Early Espresso, Cherry Cobbler, Core’dinations Early Espresso
Ink
Early Espresso, Crumb Cake, Cherry Cobbler
Accessories
Cherry Cobbler Scallop Dots Ribbon, Antique Brads
Tools
Apothecary Accents Framelits, Vintage Wallpaper  Folder

Friday, October 26, 2012

Christmas Gift Ideas

I'm making these for craft shows, but you might like to make them for gifts. These clear cases are sold by Stampin' Up! They're like CD cases, but they don't have that notchy thing in the middle so it's perfect for a junior legal pad. I also put an RSVP pen, a pocket and a calendar in these. I put directions for these on a previous post here. For the notepad cases below, I cut the tablets to 4 1/2 inches wide to accommodate the RSVP pen. I got the small calendars from SkyBluePink for a great price.

My friend Connie Stewart put a post it note pad and a smaller paper pad in hers and you can see it here.
Magnet Calendar- I simply adhered the calendar, stamped image and layers of paper together then put a magnet on the back. I used register covers from Home Depot. They come three in a package for around 4.50 and they are huge!
These tea and cookie holders are soooo adorable and would make such a wonder little gift for neighbors, co-workers, mail delivery person, etc. This is Debi Pippin's original idea. Her blog post with videos can be found here. I've had the most fun decorating the cards that go in the front pocket with the Stampin' Up! stamp set called Tea Shop. The pocket in the back can fit two tea bags if you like.
I made these Grinch pills using the 1 by 8 cello bags from Stampin' Up! the  modern label, ornament from merry minis punch pack and 3/4 inch circle punch. I hand cut the hat. The poem is on the back of his head. A lot of people use tic tacs and put the label around the package. They are too expensive to use for craft show purposes, so I opted to use green M &Ms.

Thursday, October 4, 2012

Christmas Crafts

I've been busy making alllll kinds of things! I kinda fly around flitting from one project to another:)

I wanted to try an ornament made from decorative paper. I thought less steps would equal less time right? Well, yeah, but I like the stamped ones better.
My friend Deborah and I were making some of these for the centers of our ornaments, when Deborah put two together facing out and said, "hey these are pretty enough to be ornaments all by themselves!" She is so right! Which is why I made a few more. They are really simple using the die cut. I embellished them with what ever I could find laying around.
I LOVE LOVE the Stampin' Up! Clearance Rack!! This Tangerine Tango ribbon is the perfect color for Clemson! I paired it with Elegant Eggplant and voila, instant college colors for the craft shows:) The punch was at the bottom of my drawer. It's old, old. I don't know who made it, and it might be a wolf paw, but it looks like a tiger paw to me:) I found a rooster punch for the Carolina Gamecocks and will use that with Cherry Cobbler and Basic Black for Carolina colors. I'll be all set for the college sports fans in our area who attend the craft shows!!
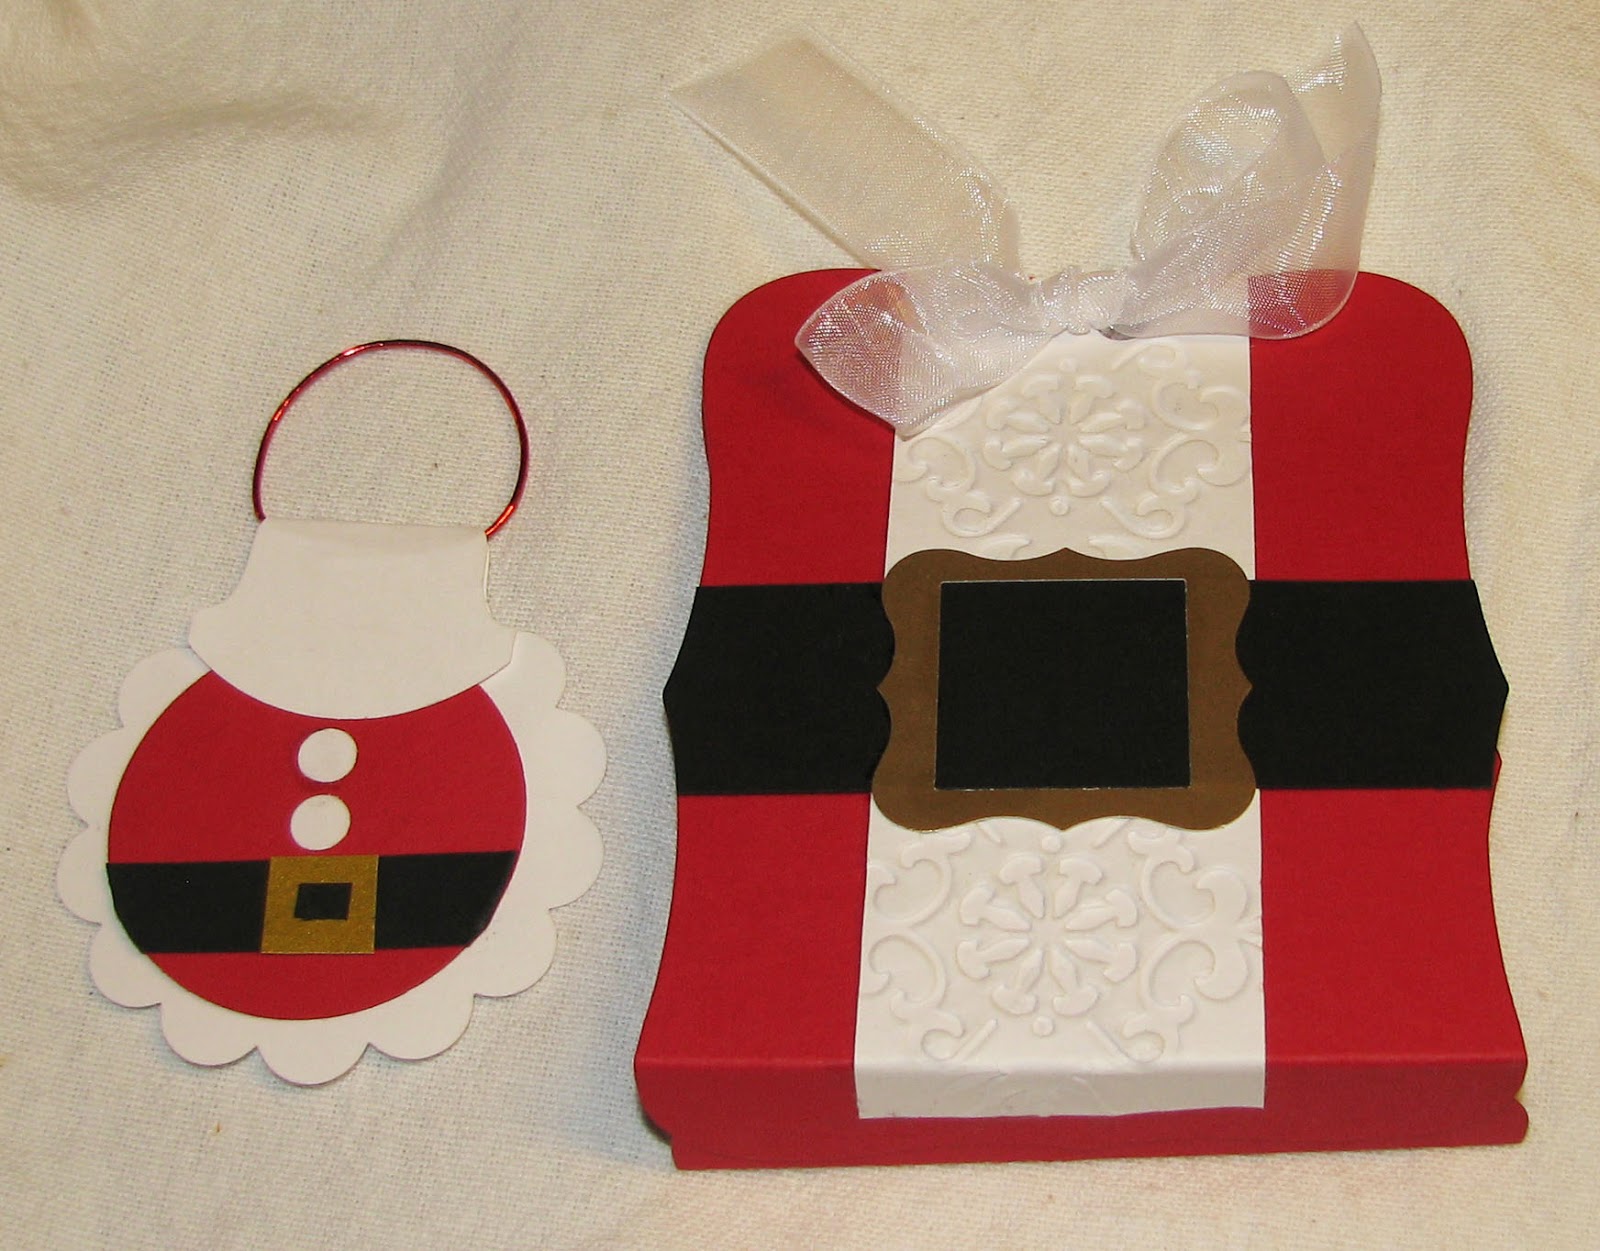
Christmas tag holder
Inside there are 12 tags and a pocket for string.
Man I love these ornament stamps and dies:)

Thursday, September 27, 2012

It's Beginning To Look a Lot Like Christmas!

I've been workin' away at craft show stuff. I wanted to get pictures up, but I don't have time to chat. I'm supposed to be at a restaurant to have lunch with Rachael in one hour yikes!! I'll come back later and put up the recipes, but I wanted Pam to see the bird and snowman. The knot in the snowman's scarf is too big, I need a 1/2 inch punch before I make any more. Oh and the carrot nose is too big, I forgot Shana said to use the bird builder punch! Geeze. I got the idea for the snowman from Shana Gaff.The bird card is one I saw Kittie Caracciolo do and just loved it! 


Monday, September 24, 2012

Fall, Halloween, and Christmas


Project Details
Stamps
French Foliage
Cardstock & Papers
Old Olive, Midnight Muse, Very Vanilla
Ink
Old Olive, Midnight Muse, Cajun Craze, Summer Starfruit, Rich Razzleberry, Early Espresso, Crumb Cake
Accessories

Tools
Autumn Accents Bigz die


Project Details
Stamps
none
Cardstock & Papers
Basic Black, Old Olive
Ink
Basic Black
Accessories
Sharpie marker
Tools
Top Note die, Keepsake ornament die, ½  inch circle punch, ¾ inch circle punch, tab punch


Gift Card Holder
Cut two stockings in card stock and use designer series paper for the heel, toe and top cuff. You also need to cut two of the top cuff. Embossing stocking (I used Houndstooth)

Make the opening for the gift card in the front stocking with the word window punch. Place it about 1/4" down in the middle of the top of the stocking, then extend the opening on either side to accommodate the size of the gift card.

Use sticky tape to adhere the two stockings together, leaving a space for the gift card. Attach presents, ornaments, or other punch shapes like teddy bear or candy cane would be nice. I just cut presents on paper cutter and attached ribbon. Glue the second cuff on the back to cover up the backs and any adhesive from the ornaments and presents.

Determine placement of the cuff from the front so that it will cover the gift card. Insert a decorative paper fastener or brad. (I punched a tiny hole first so that the layers of card stock wouldn’t get all bent and crinkled.

You could attach a ribbon to hang from the corner if you like. Ohhh I just had a brain sparkle! Lace ribbon would be so pretty on the first one, with one of the Antique brads that I don't have yet!! Okay, THAT will be on my next order!
I sponged the Northern Flurry embossing folder with Crumb Cake ink.

Project Details
Stamps
Keepsake Ornaments
Cardstock & Papers
Be of Good Cheer dsp, Gumball Green
Ink

Accessories
Cherry Cobbler seam binding ribbon, Gumball Green stitched satin ribbon
Tools
Keepsake Ornaments die, Houndstooth embossing folder, word window punch, Holiday Stocking die