

The new generation Legal Pad covers use a 12 by 12 sheet of cardstock cut down, and they come with a customized pen that coordinates with the pad cover design. I really like the addition of the pen, but I don't like the way the fold on the cover works. There is a half inch 'spine' which is too large for the side of the notebook causing a gap, and the cover kind of slides around exposing the pad. This improper fit bothers me. I know it was designed this way to create a pen holder, but why not use a ribbon for that and adjust the size for a more proper fit? This was my thought process today as I began to make some to sell at a gift shop. My design incorporates elements of the old and the new for an even better design. At least I think so:)
I also looked at the new generation Post-it Note cover and I didn't like it as well as the one I'd used in the past. To me, there is just something rather elegant about using a suede paper spine. I still like the design found in one of my many many books on making handbound books and journals. So, no changes made in that one.
Materials for Jr. Legal Pad Cover
Card stock 8 ½ by 11
Note pad
Red-liner or Wonder tape
RSVP pen
Coordinating paper for inside of RSVP pen 3 3/8" x 1"
Coordinating paper for the top of the legal pad 5” x 1”
Scoring tool
Art stamps
Ink pads and any coloring medium you like, Prismacolor pencils, Copic markers etc.
Decorative paper
Ribbon 5 inch piece of coordinating pattern
1. With the cardstock in a “portrait” position, score at 10 ½ in, 10 ¼ in, and 5 in.
2. Cut on the score line ½ inch from the bottom, and 5 inches from the left edge. Refer to the diagram.
3. Cut away a portion to give your folder a curved edge at the top on the left side. See diagram.
4. Fold the left bottom score up. Fold the left side to the right. This makes a pocket Adhere the pocket to the main cardstock using wonder tape at the bottom fold. This pocket can be used to contain receipts, stamps, envelopes etc.
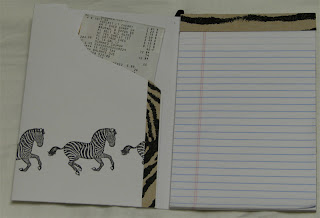

5. At this point, stop and decorate, stamp and embellish the front and the inside pocket with any technique you like. First, glue or tape your design to a cardstock mat to provide support for the pen holder. Take a 5 inch piece of ribbon folded in half and secure with red liner tape to the front cover. Finally, tape the completed design over top of the ribbon.
6. Cut a strip of decorative paper to cover the top of the tablet 1 by 5 inches.
7. Fasten the pad to the first score fold with the red-liner tape. The ½ inch fastens to the card stock. The ¼ inch fold is the thickness of the pad. The front folds over and viola!!
8. Take the end off the Pentel RSVP pen and fold the 3 3/8" x 1" piece around the pen refill, then slide it into the pen. Replace the end and you have a pretty matching pen.

Post-it Pad Cover
Materials:
Part of the Book Purpose # to Cut Size
matboard front & back covers 2 3 1/8” x 3 1/8”
Decorative paper cover front & back 2 4 ½” x 4 ½”
Suede paper spine/hinge 1 2” x 4 ½”
Suede paper inner spine 1 2” x 3”
Pages Post-it pad 3” x 3”
Decorative paper endpapers 2 3” x 3”
Other Materials:
Items to decorate covers (clay images, feathers, charms, ribbon etc.)
Double stick tape, glue stick or Xyron
Scissors
1. Cover the matboard with decorative paper.
2. Place the covered boards right side down on top of the spine paper. With all wrong sides facing you, allow ½ inch in between for the Post-It pad.

3. Fold and glue spine ends to inside of cover boards. Then glue inside spine cover in place.
4. Glue the end papers into the inside of the covers.
5. Take off the backing sheet from the Post-it pad and place on the back cover board.
6. Embellish the cover with buttons, charms, shells etc.